Designing and bringing the pieces to life is such a special pleasure for me. It involves purposeful mental observations, a bit of fantasy, some vision, lots of experimentation and finally, the reward, fruition. Its so satisfying to have a finalized set of disparate objects come together to create a meaningful group that not only speaks to me but to others as well. Whether it be resin blanks, rubber stamps, foam stamps or simply just searching out unique and wonderful things to share with you. Our little company is a delight and a labor of love! Thank you all for traveling this road with us and for supporting this endeavor!


Fragments- Six Ways

Kae Pea Collage
We are pleased to announce the release of Sandra Evertson’s new line of ArtFoamies called Fragments.
Read moreCreative Jumpstart 2021

I’m so happy to be participating in Creative Jumpstart this year. It is the 10th Anniversary.
Check out my class which goes live February 8th. In the meantime, here is an interview with Nathalie Kalbach.
https://vimeo.com/463612927
Cupula ArtFoamie Velvet Shrine "HOW TO"- Sandra Evertson

When Kristen Powers asked me to create some images for the ArtFoamies collection I was thrilled but have to admit I had never used one before so I was really anxious to try out the samples she sent. Well as you all already know they are a joy to create with! I will show you step by step within this photo series how to create this simple but Fabulous Velvet Shrine and to make it convenient I will leave this post up permanently for you to refer to anytime.

SUPPLIES LIST
chipboard
old box
scissors
tacky glue
marker or pencil
small clamps
black craft paint
brush
ruler
upholstery needle
embroidery thread
velvet strip 1 1/2” wide x 16” long
trinket charms
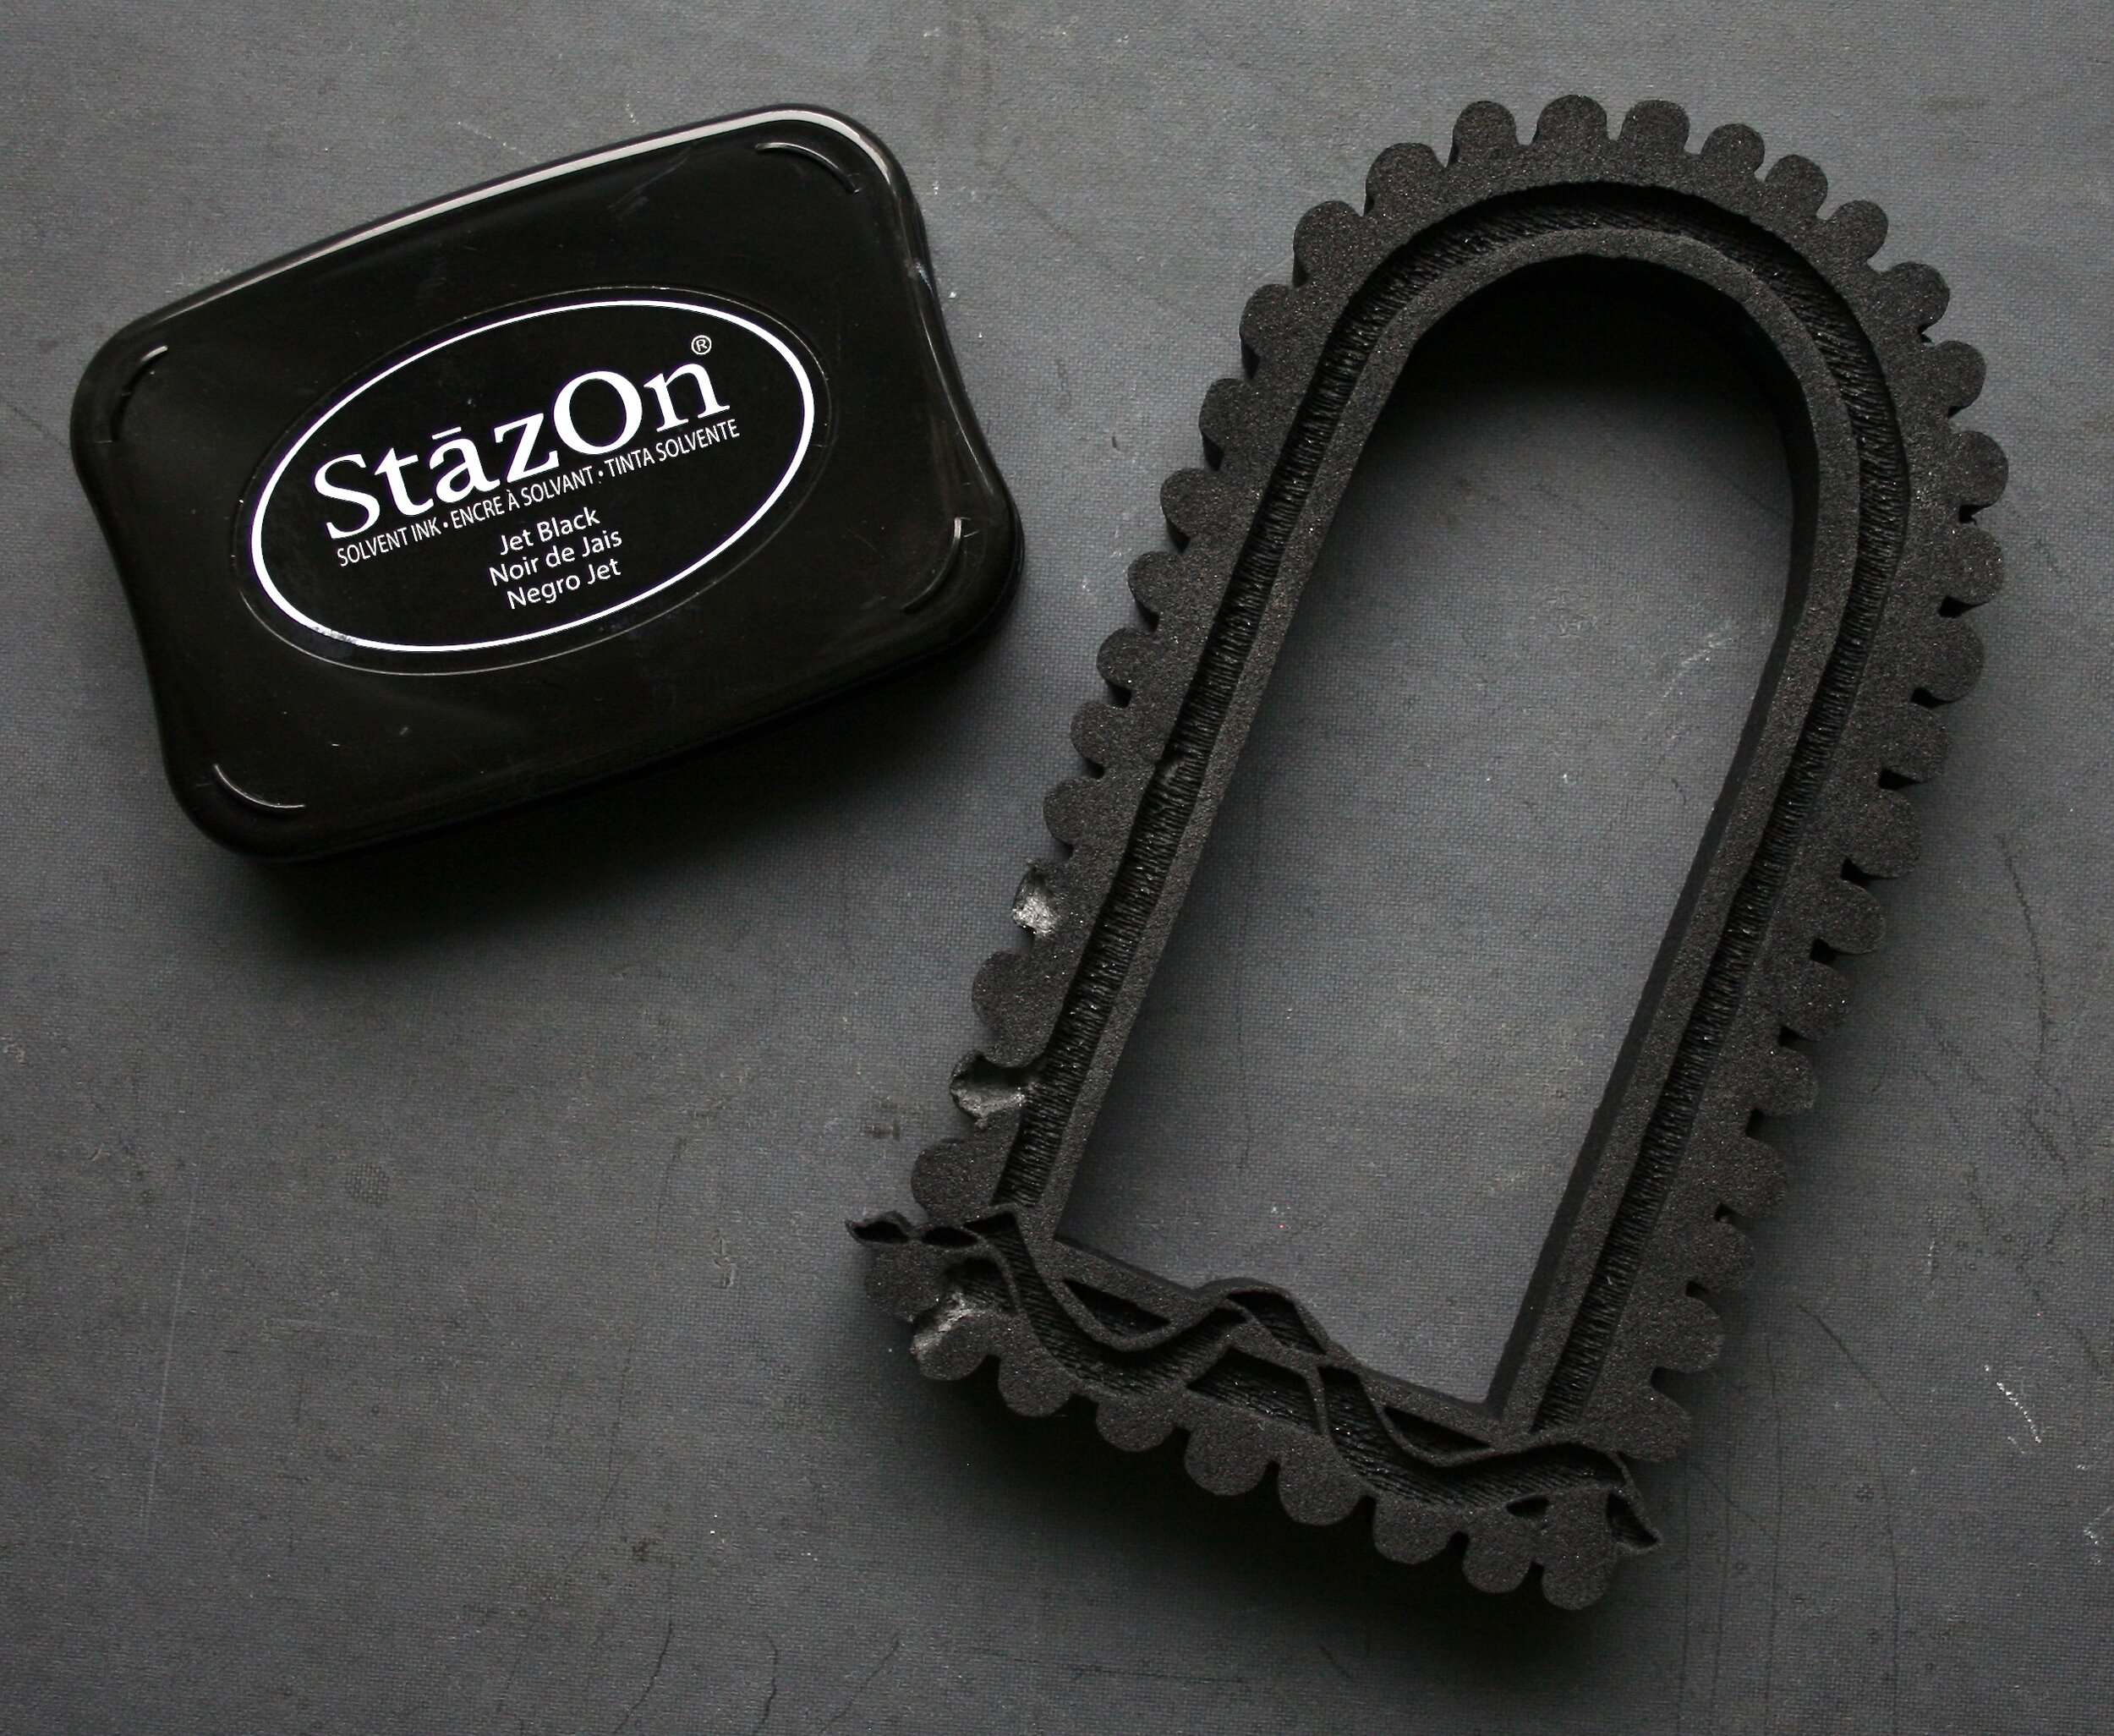
Load the ArtFoamie up with black ink.

Stamp onto a piece of chipboard.

Cut out with scissors.

Make sure to cut out the portion that creates the scallops because we will stitch into those later.

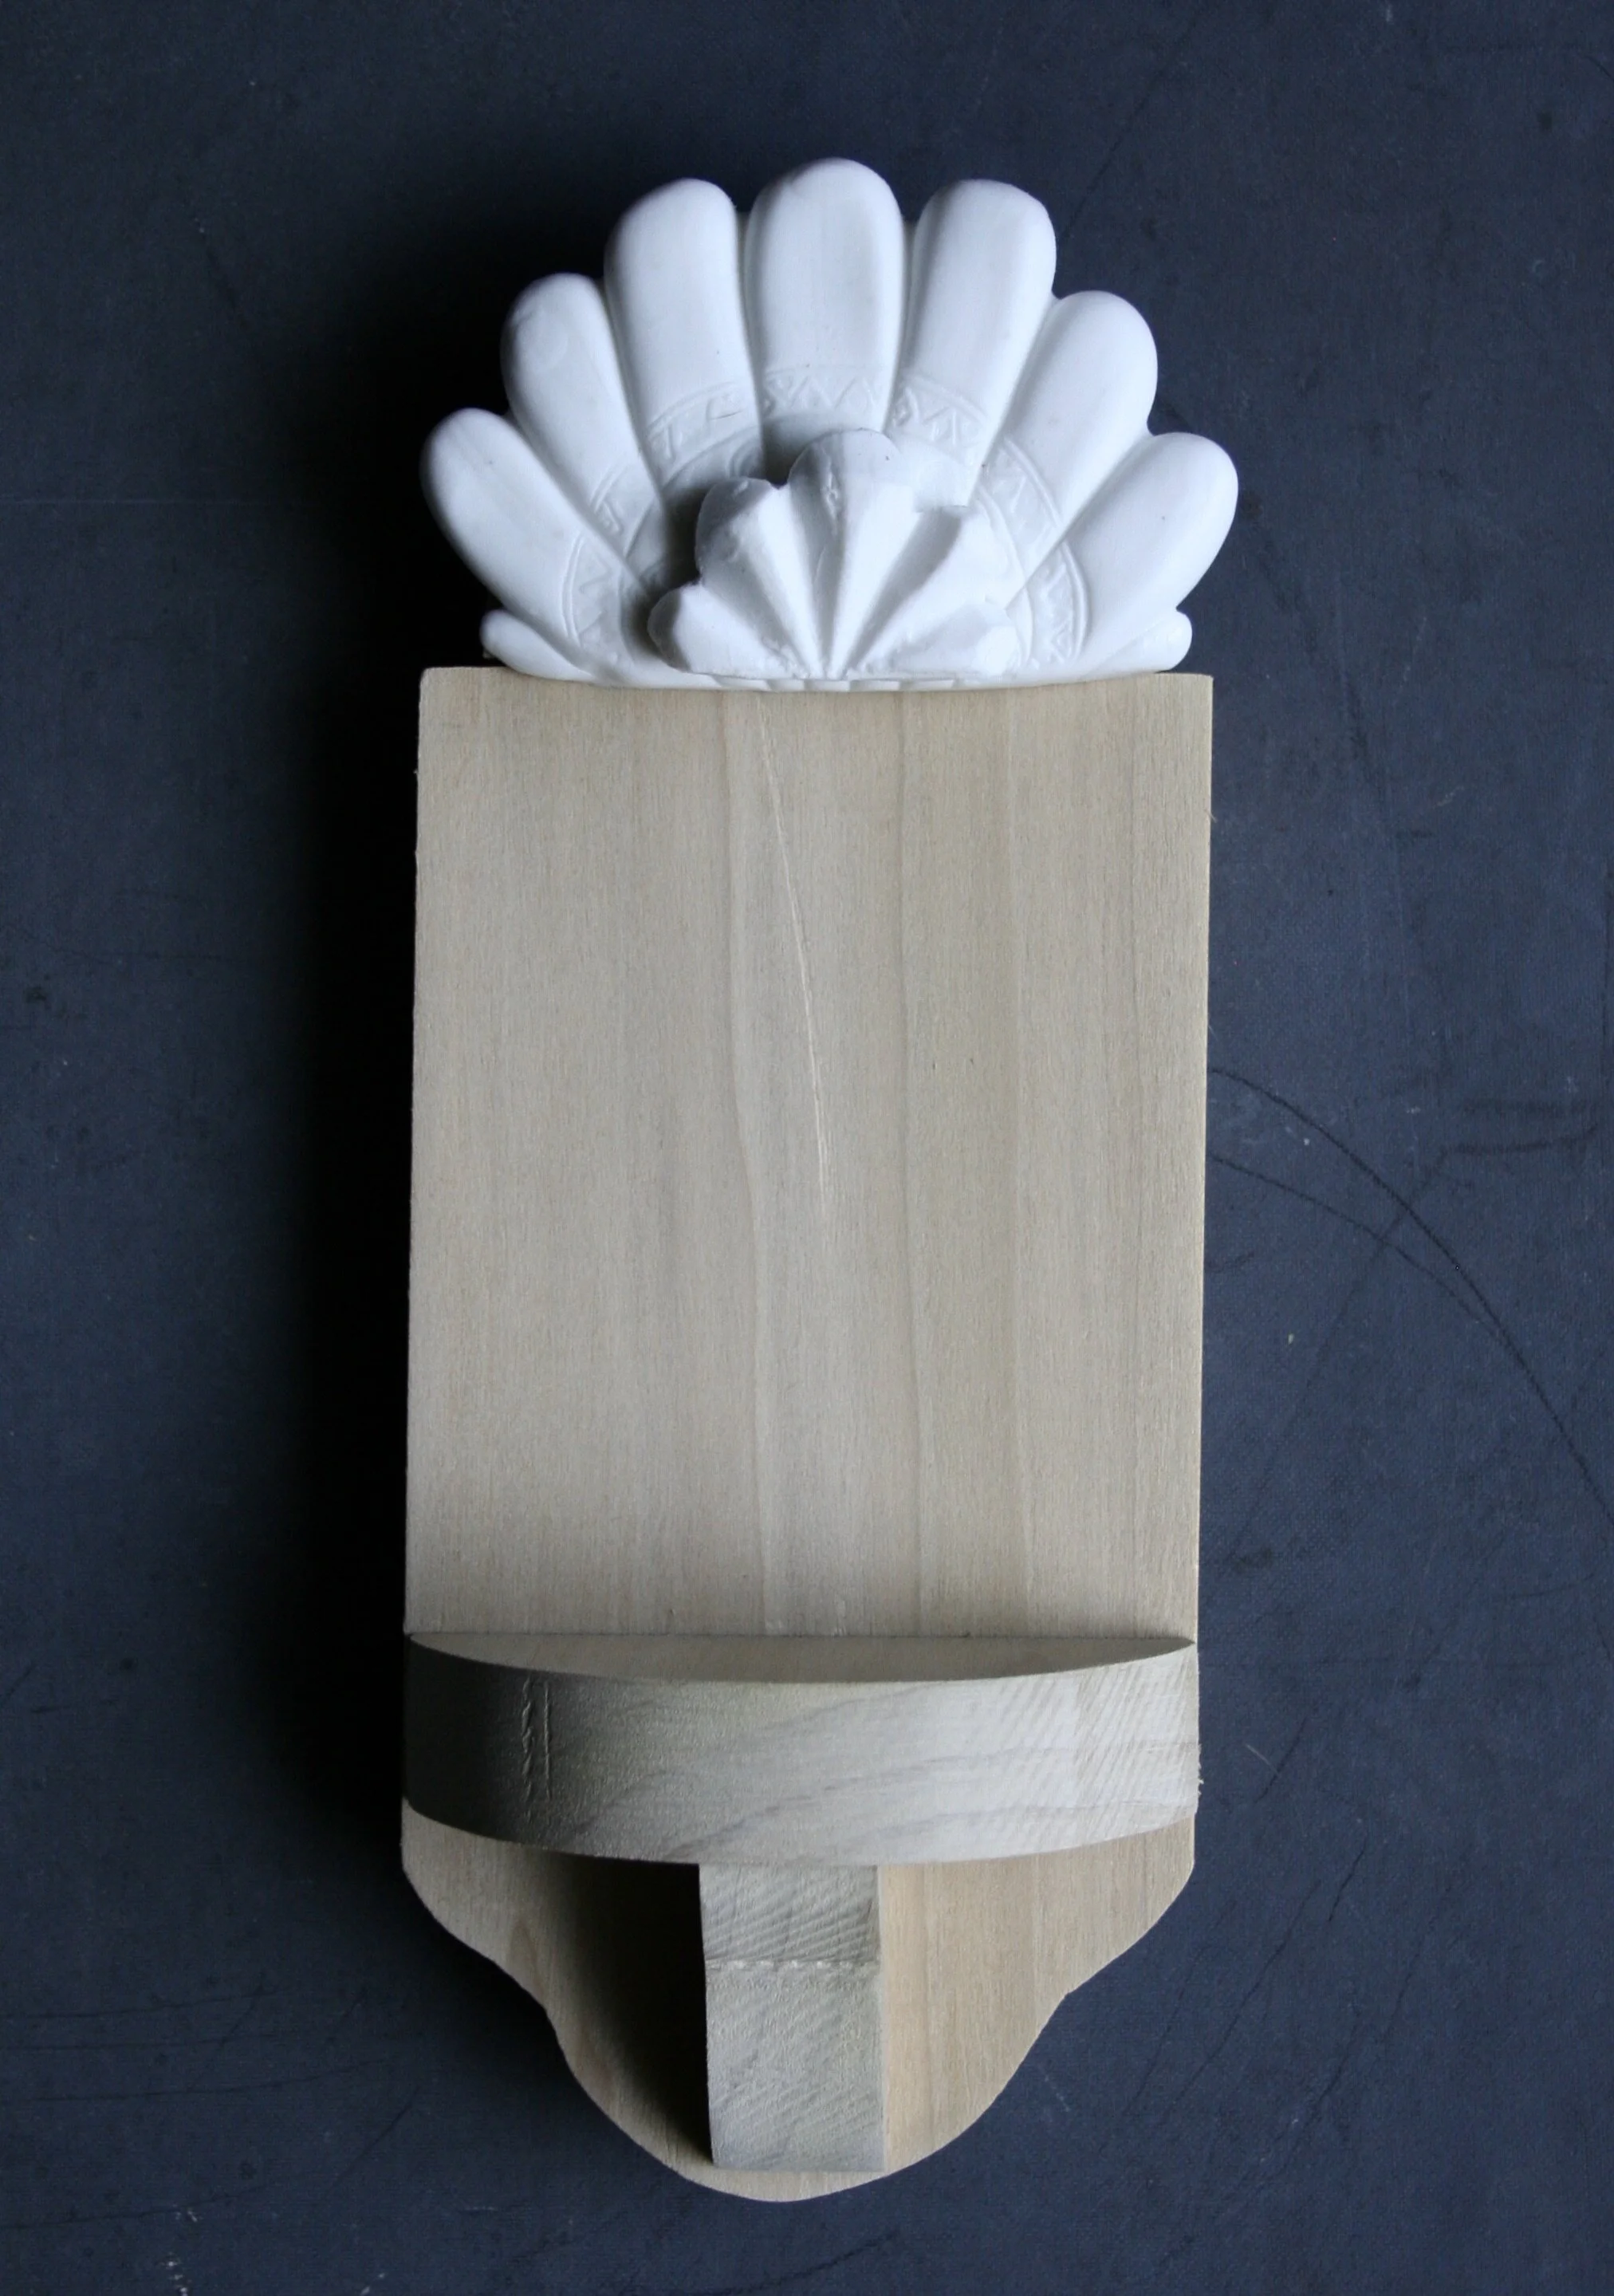
Place Cupula ArtFoamie on top of a piece of old cardboard box and trace around it with a marker or pencil. No need to get into the scallop crevices just create an “arch” shape as this piece will be used as the back of the shrine.

Cut out the arch piece. I have marked mine here to give you and approximate size 2 3/4” wide x 5 1/2” tall.

Use a ruler and trace out a long strip of cardboard that will become the sides of the shrine. Measure approximately 2 3/8” wide x 16” long.

Cut out the strip and begin folding it bit by bid to create and arched shape, its ok if the cardboard wrinkles up a bit it will just add to the vintage and folksy feel of your finished piece.

Continue bending the cardboard to creat the arch shape of the Cupula. Use a small clamp to hold the bottom together, do not glue yet.

Take the back piece and fit it behind the clamped “sides” strip.

Use the clamp to adjust the size of the strip so that it fits fairly snugly together.

Place the front stamped chipboard piece of the shrine on to the top.

Place tacky glue along all the seams and glue together. Use the tape to hold things in place while the glue dries. It take a little finagling but once you get the tape in a few places it will hold together nicely. You will remove the tape once the glue has dried so don’t worry about where you place it.
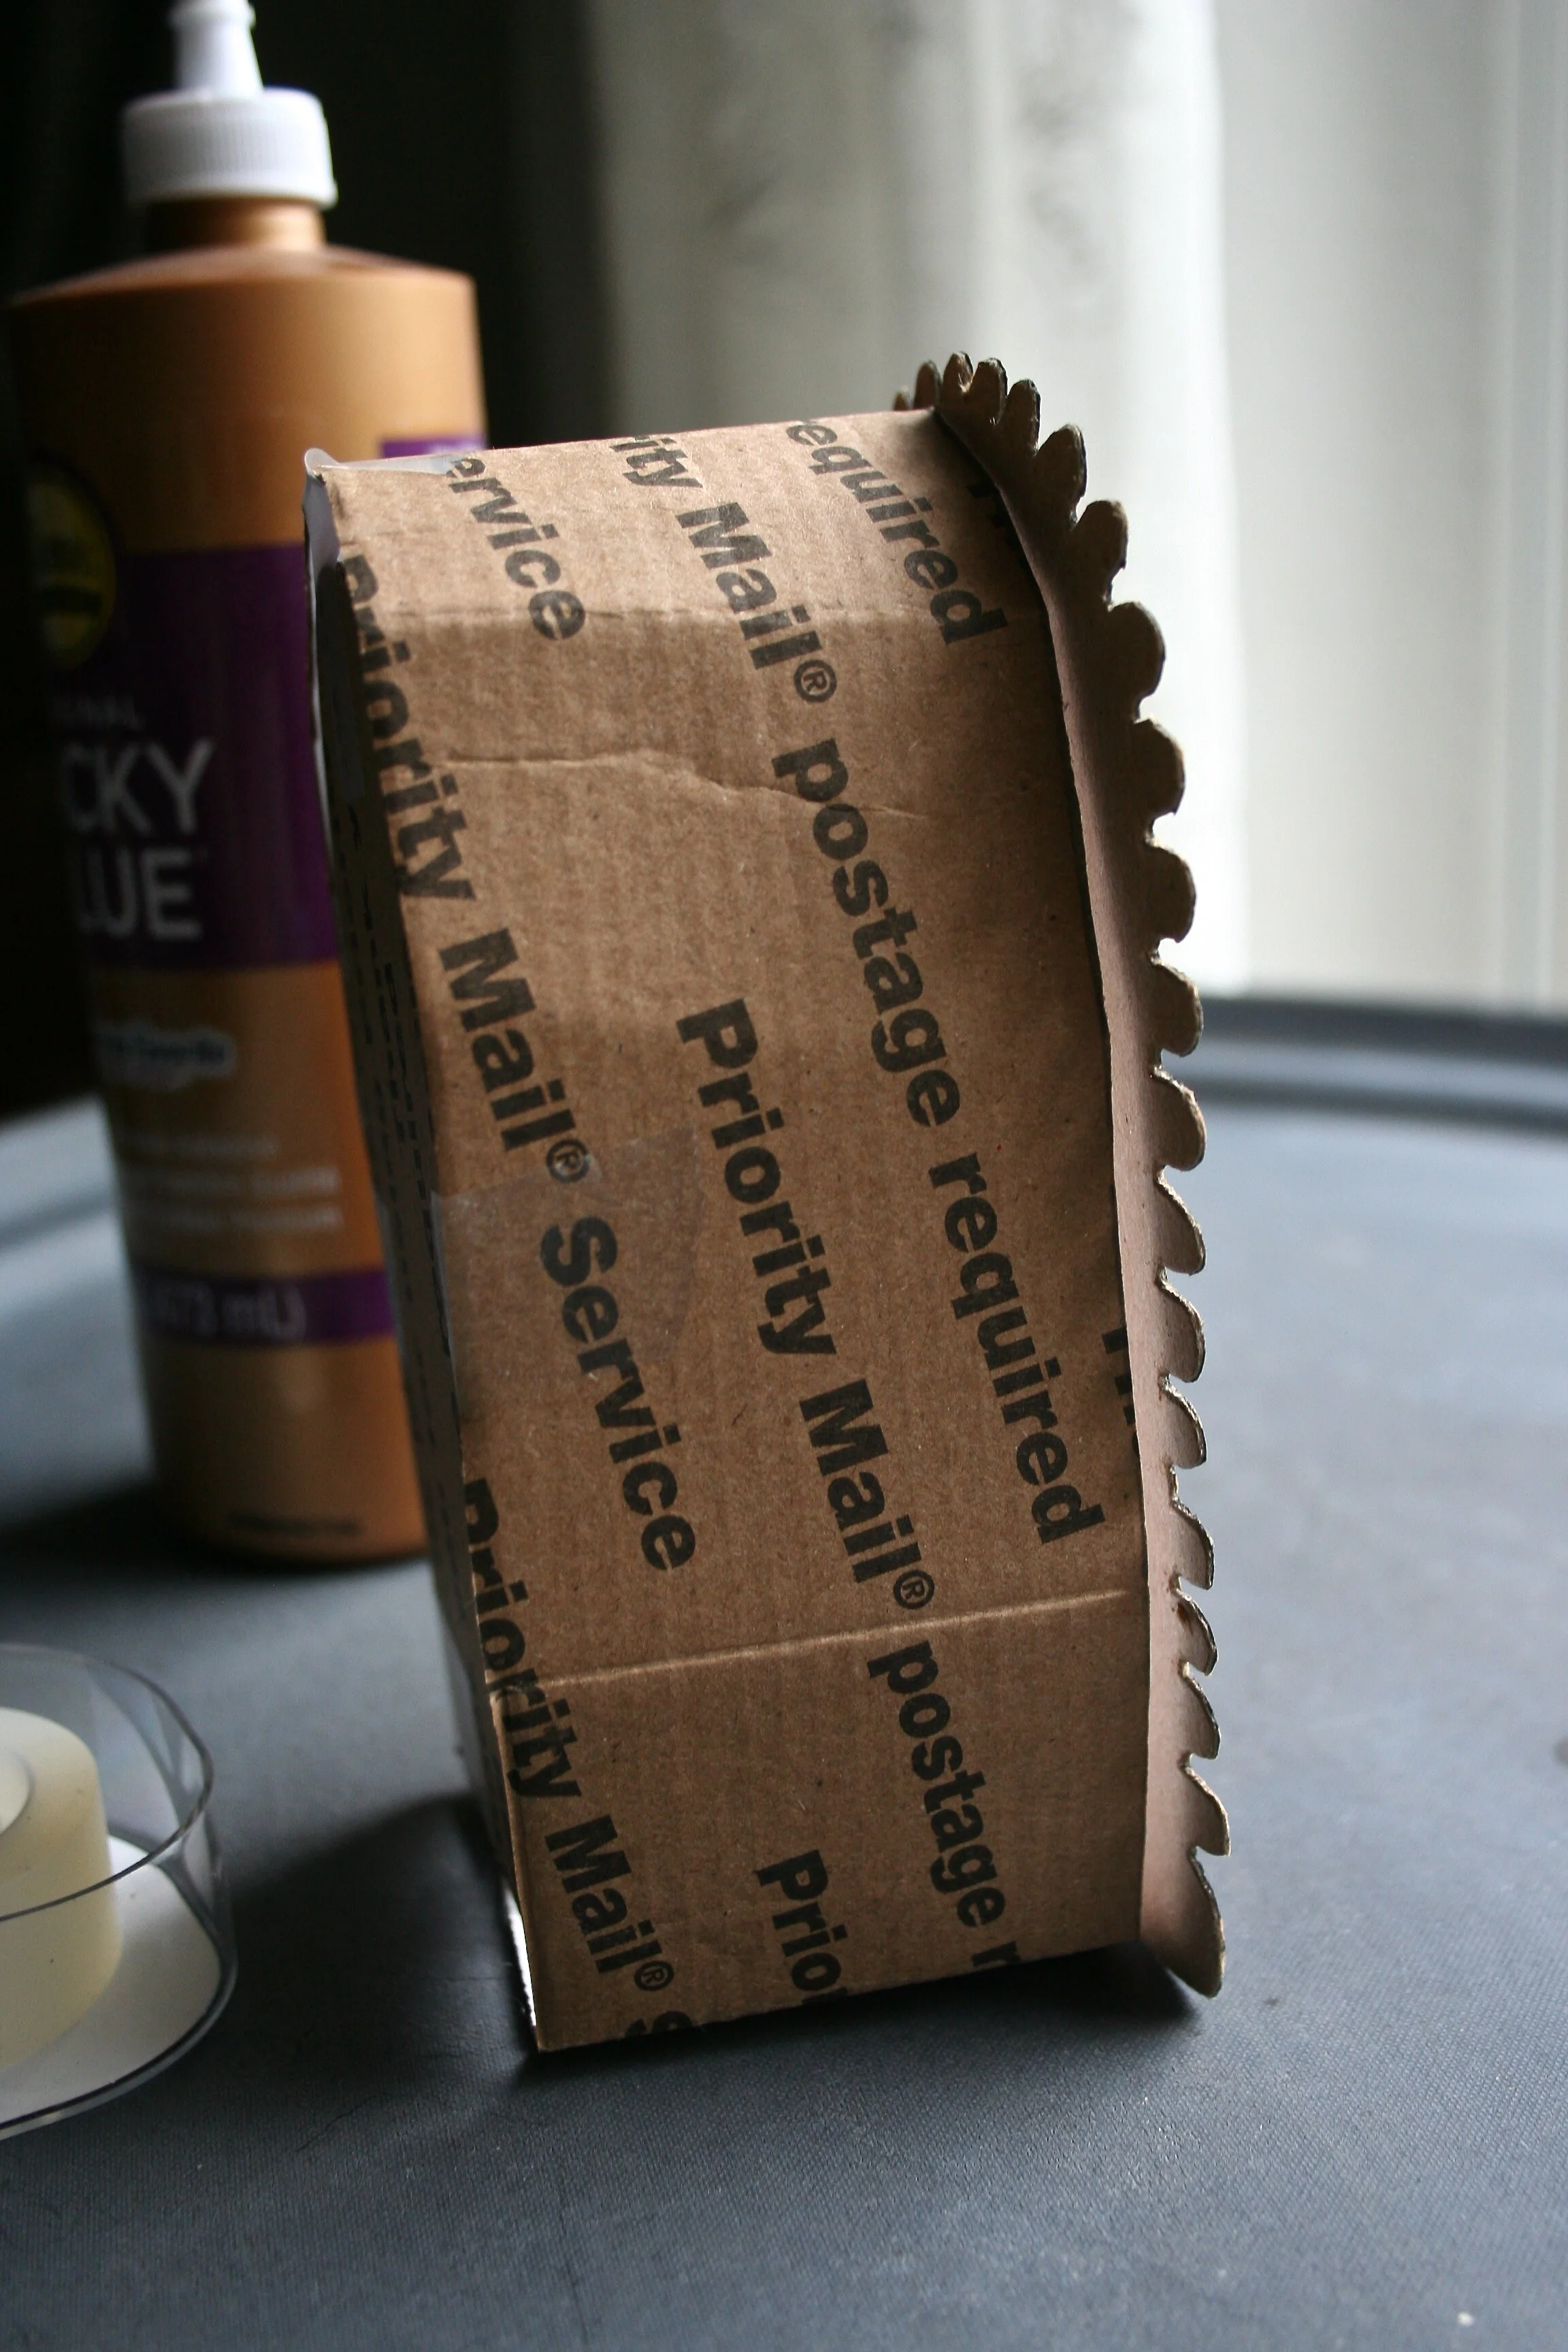
Just lightly place the tape so you can peel it off later.
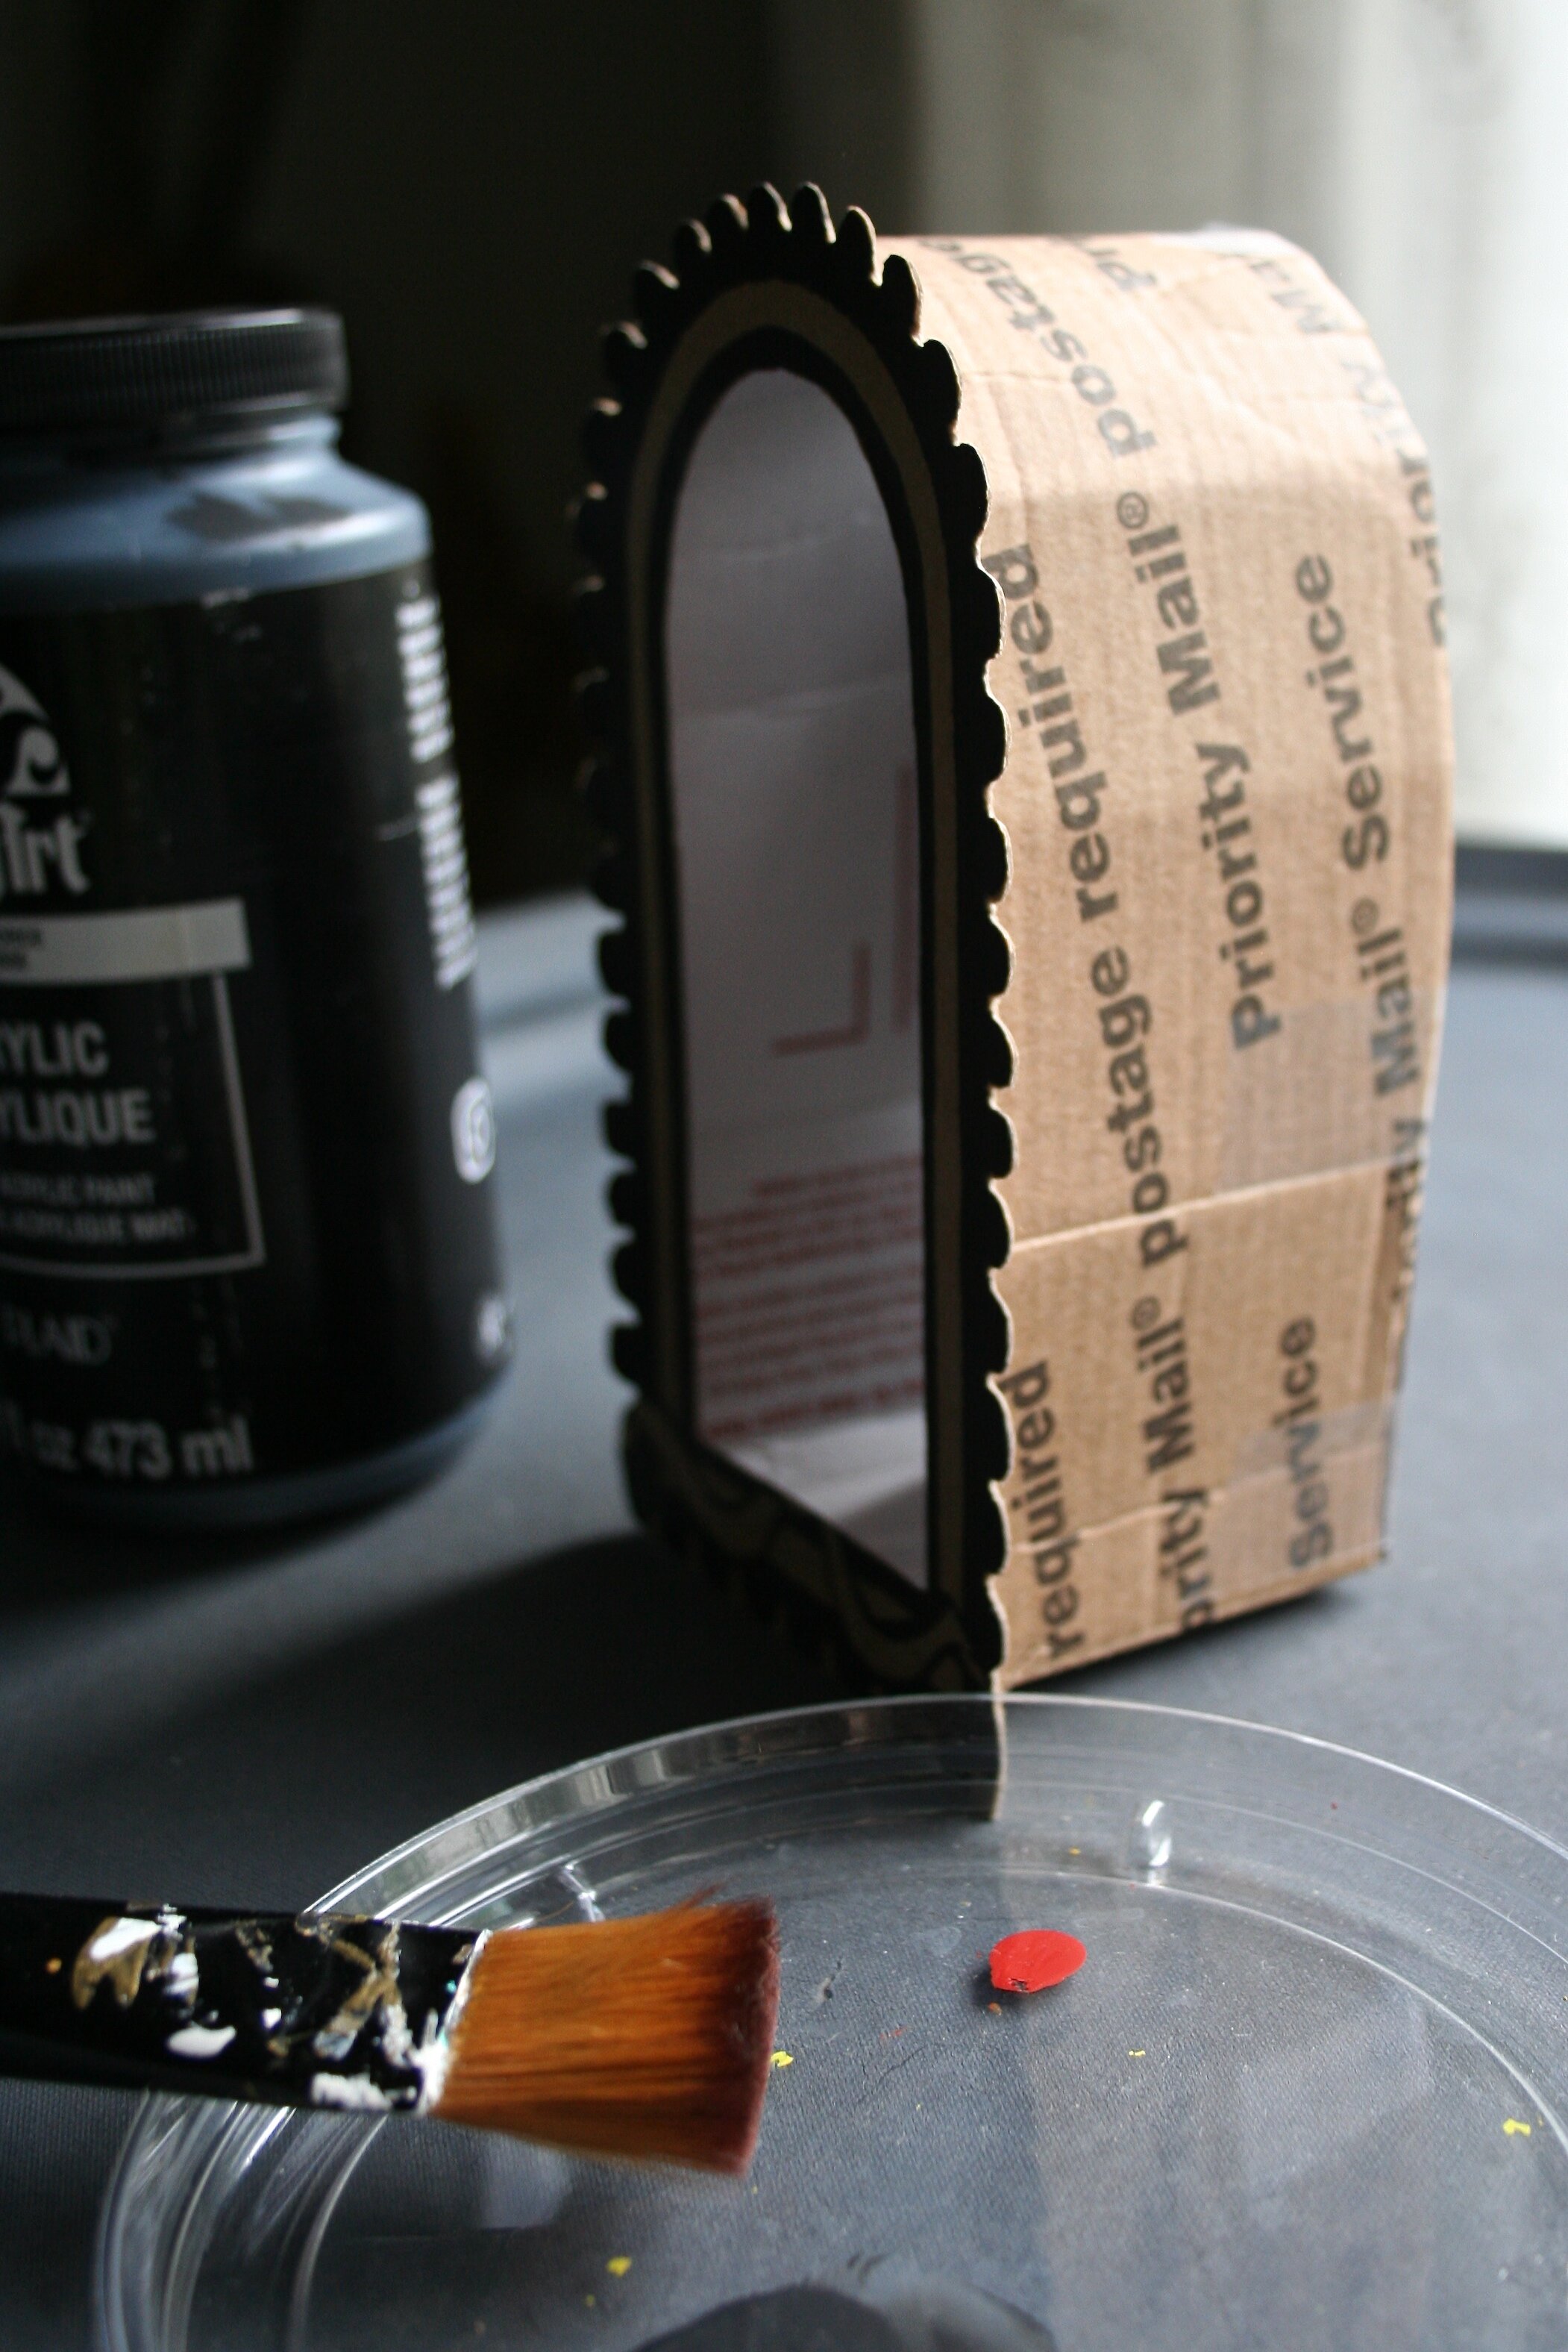
Paint the cardboard shrine with black craft paint, first paint the inside.

Then paint the outside and the bottom and along the scalloped back side of the shrine, no need to paint the front portion as the velvet will be covering it.
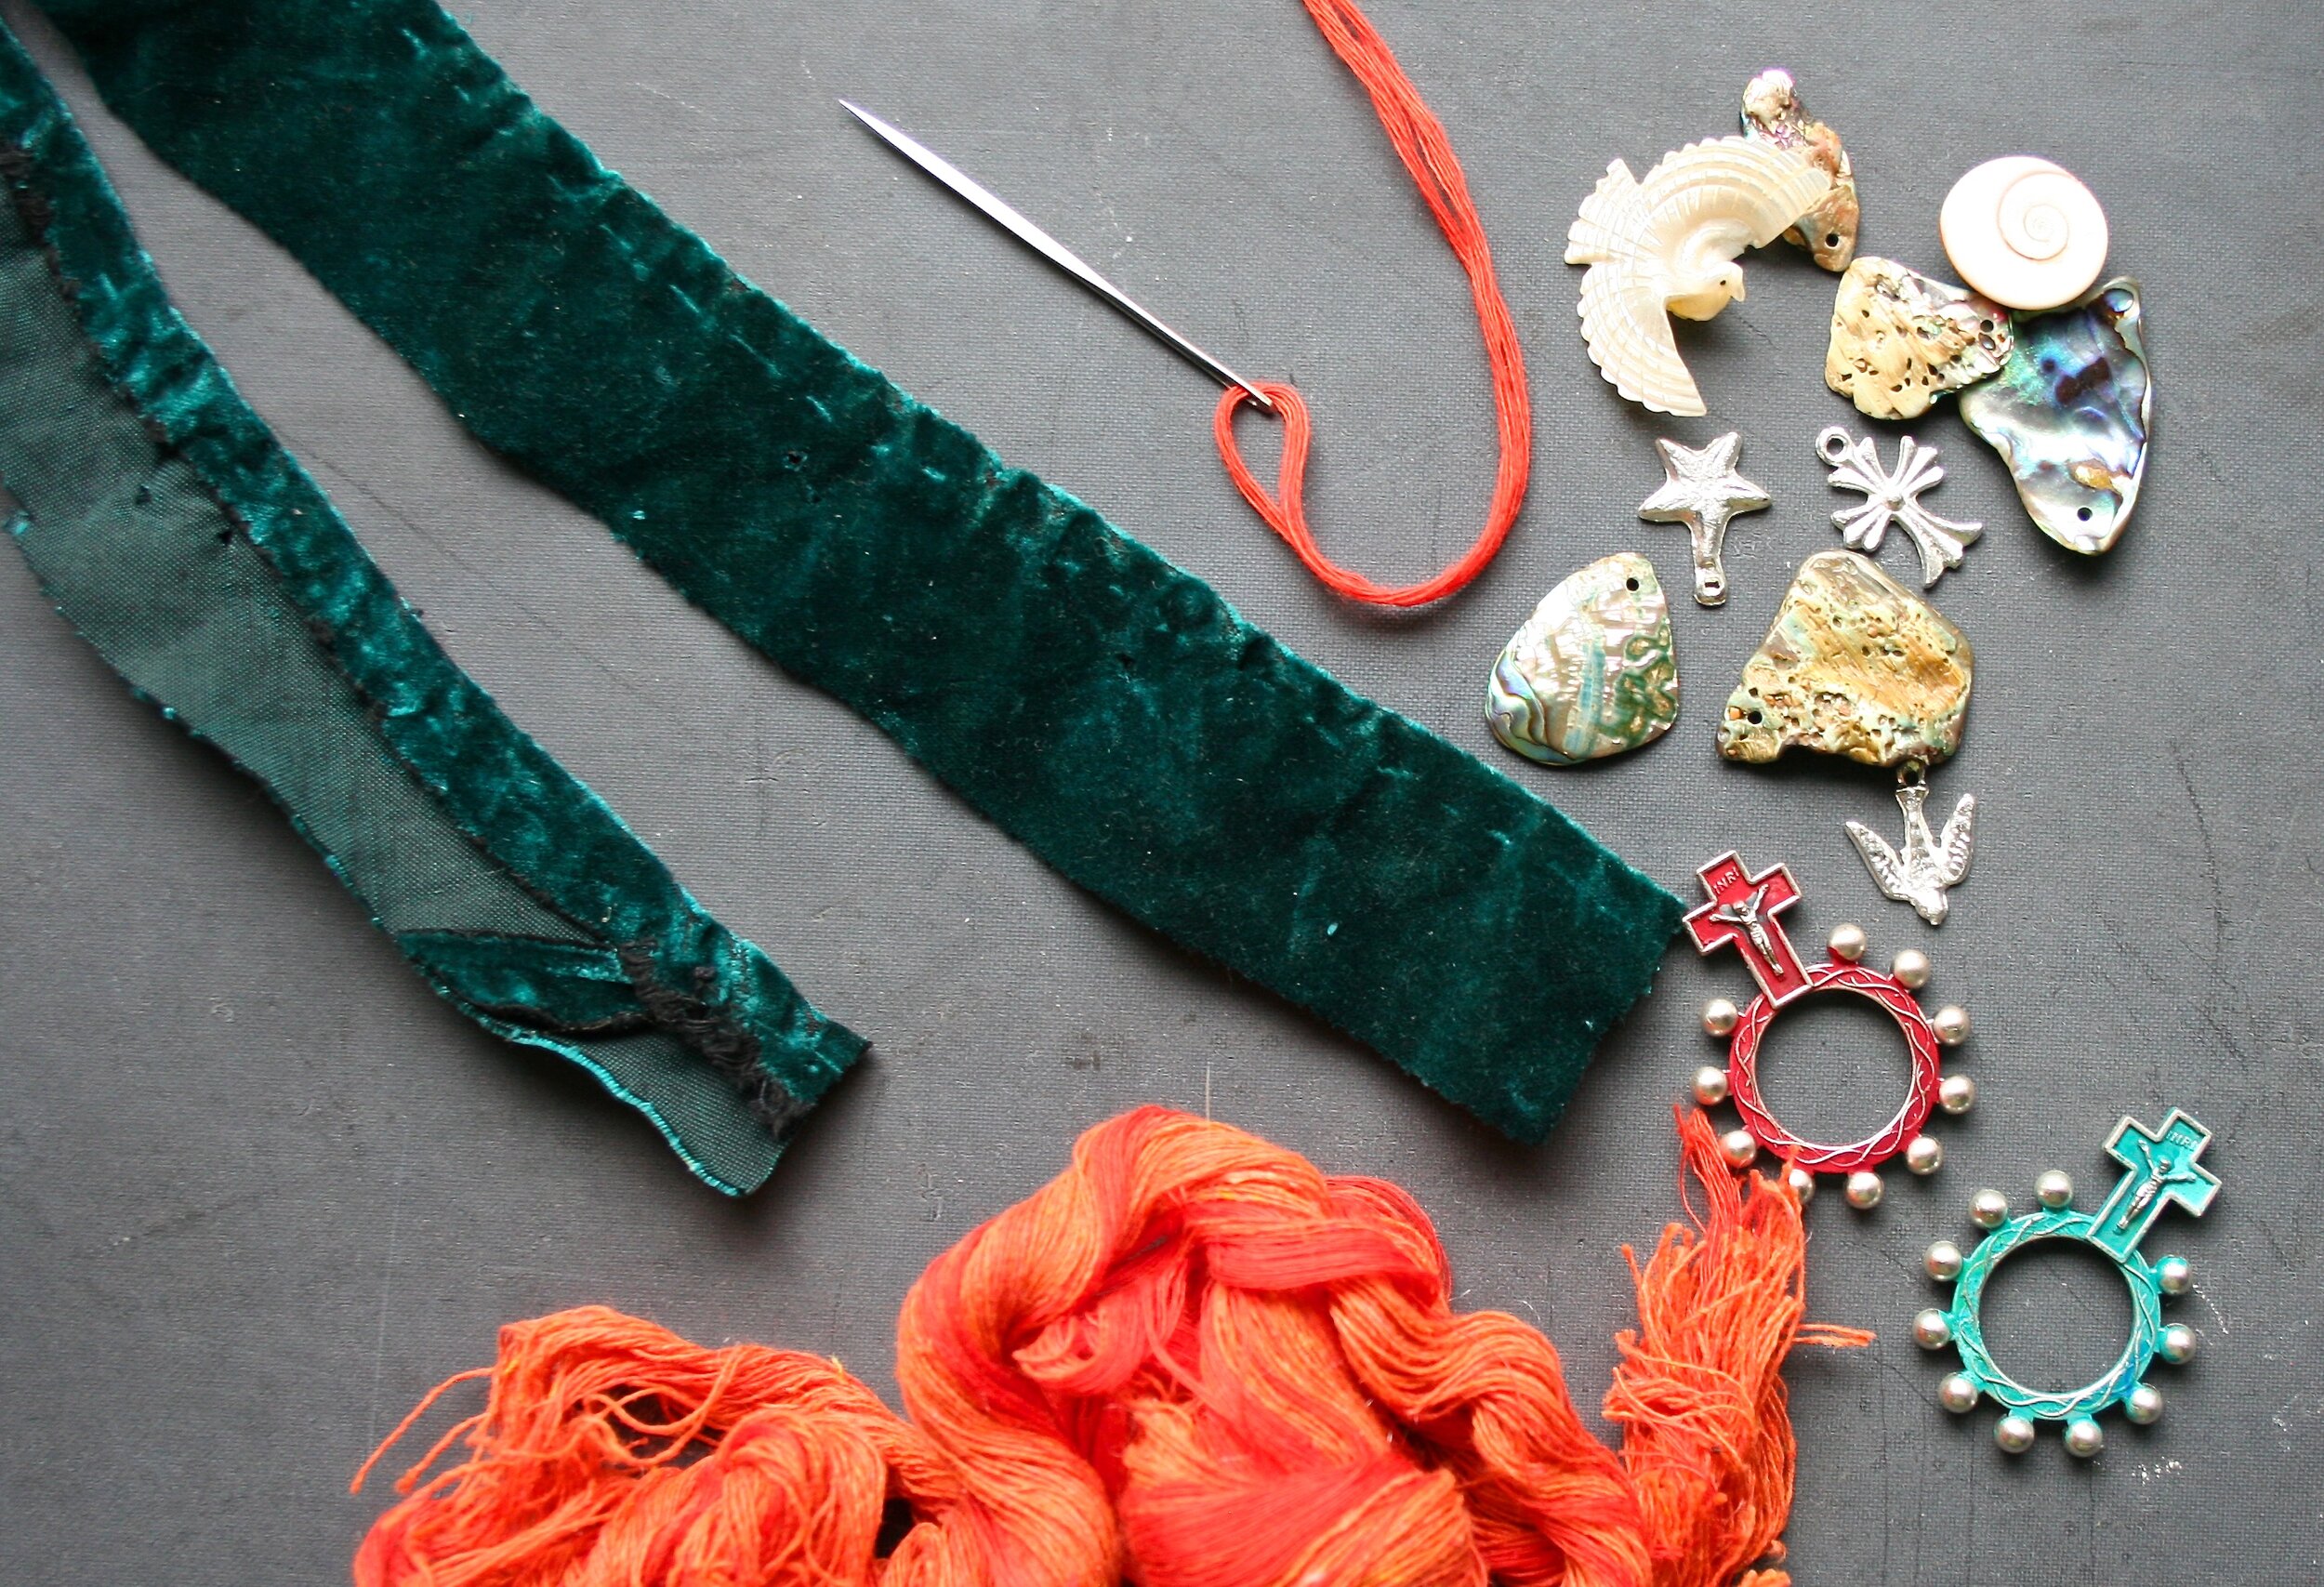
Gather you velvet, needle, embroidery thread and trinkets to embellish the front of your shrine.

I used a Soldiers Finger Ring Rosary (sold here on our website in the Antiquities section.

Place your strip of velvet on top of the front of the shrine, start at the bottom right corner. Leave about 1/4” to 3/8” of fabric on both sides that can be folded and glued around the backside edge and into the inside edge of the front piece.

Run a bead of glue along the front edge,

some more along the front inside edge and some more around the back edge, working your way up as you go.

Smear the glue around evenly

and fold the velvet edges over the inside edge

and back edge to cover the frame.
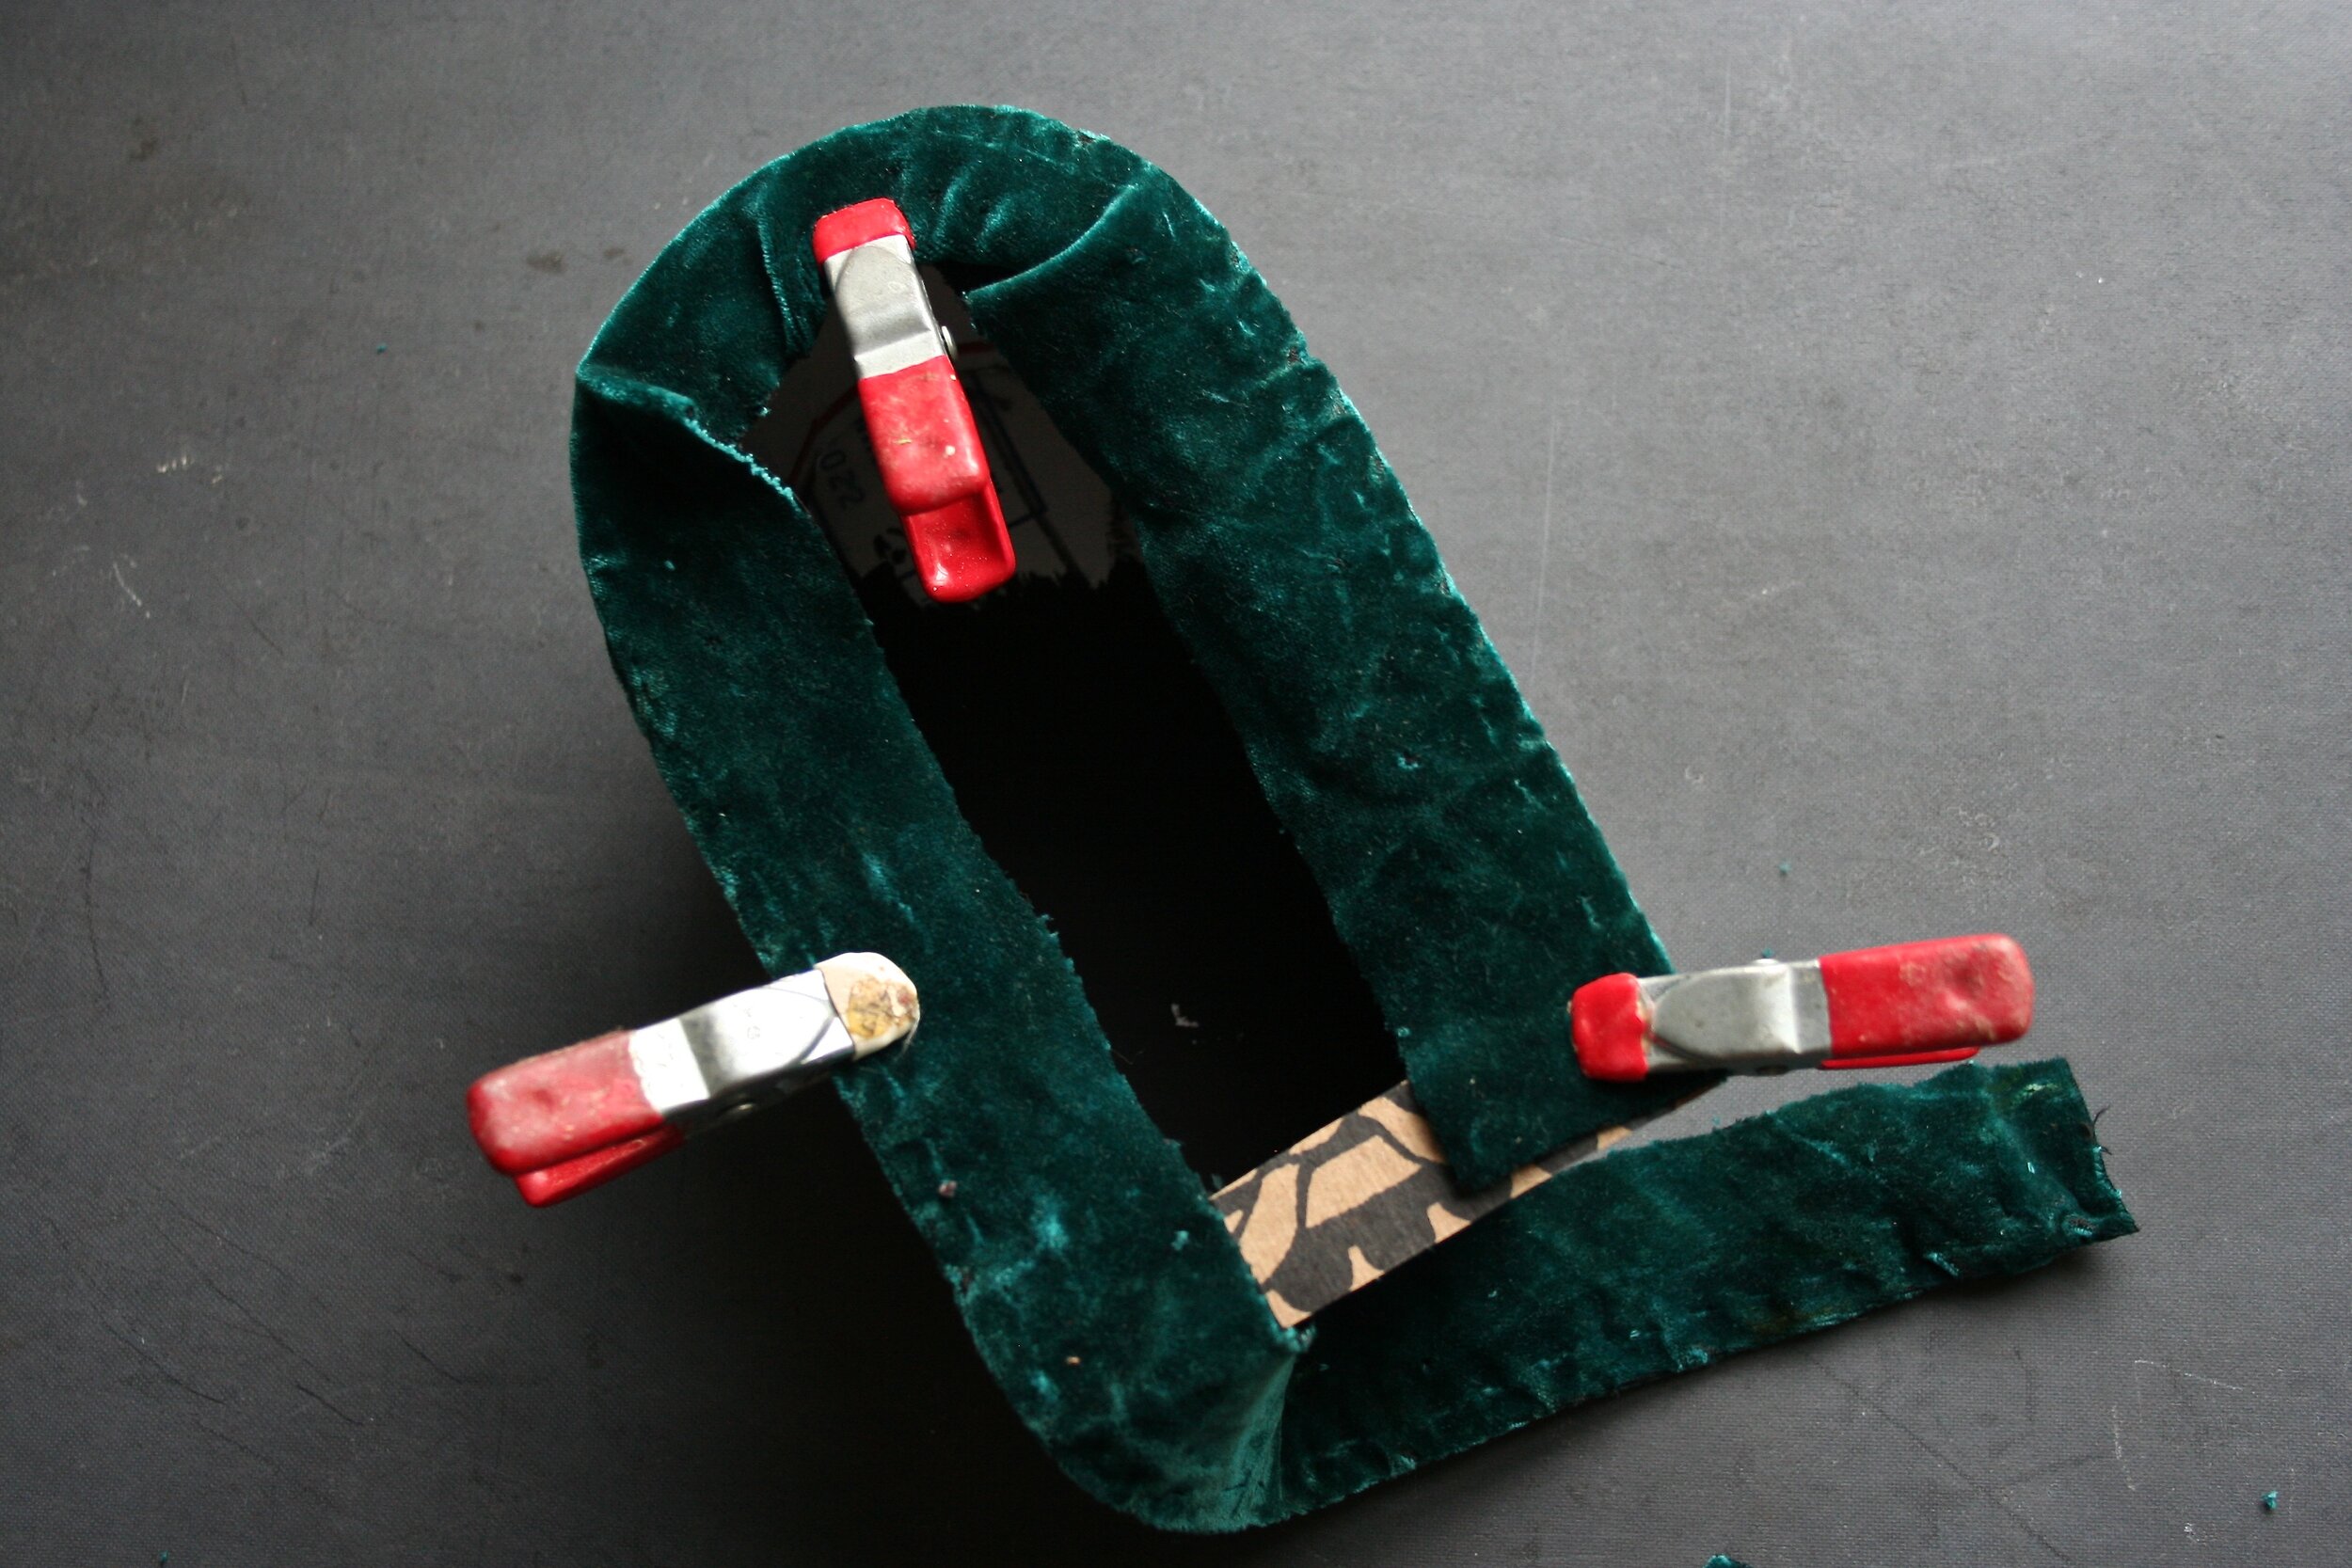
Use the small clamps to hold fabric in place.

Fold the corner into an angle, glue and clamp in place until dry.

Thread the upholstery needle with a very long piece of embroidery thread, but don’t worry of its not long enough because you can always just pick up where you left off if you run out of thread. Begin the first stitch pushing up through the bottom of the right corner.

Hold onto the tread and pull the needle fairly snug through the scallop “niche” then move onto the next “niche” and do the same thing pulling the thread up snug but not so tight that it creates too much tension which will create wrinkles and distort the fabric.

Continue stitching all along the outside edge creating a beautiful finished thread boarder. On your last stitch pull the thread through the back of the frame, knot and glue in place.

I sed a contrasting color embroidery thread and used two stitches to adorn the top of my new shrine with a Soldiers Finger Ring Rosary.

If you desire you can add more treasures, charms milagros, etc. to the front and sides of your shrine to create a very personalized piece.
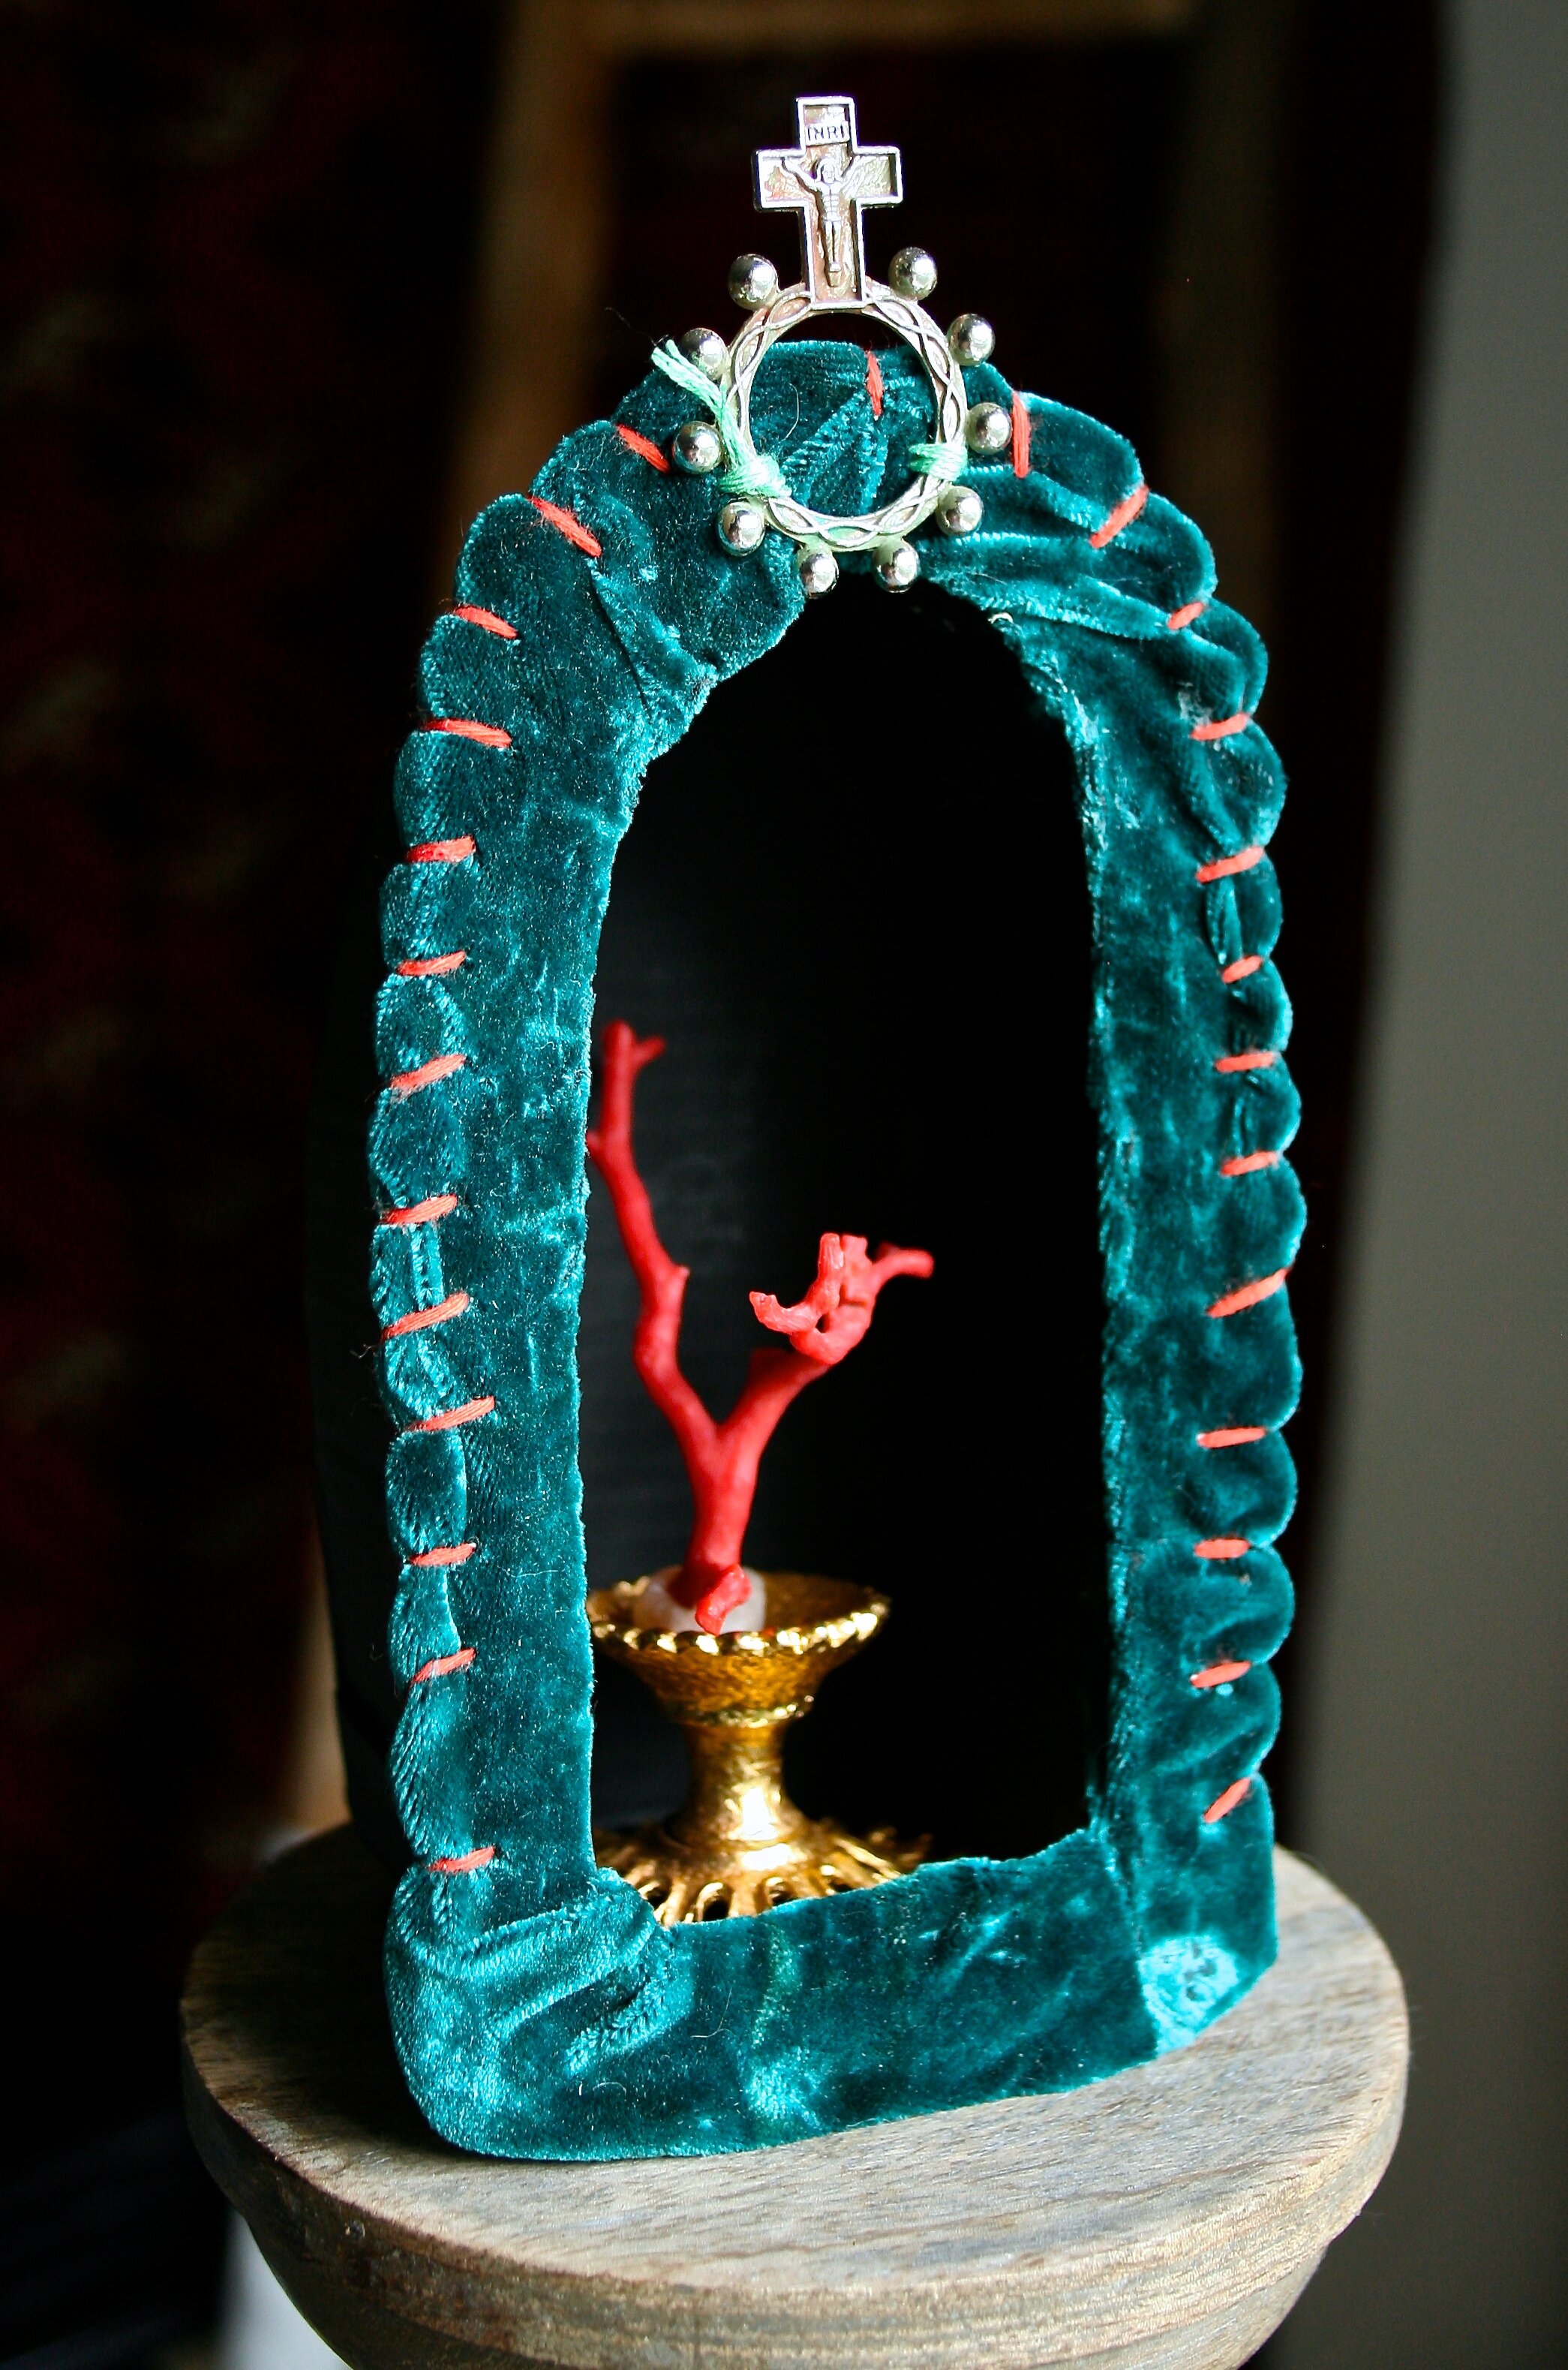
You can use your wonderful new shrine to showcase a special vintage treasure or even a RELICS & ARTIFACTS® piece you have created! I hope you all enjoyed my little How To Class. We would LOVE to see some of your finished SHRINES and would like to create a MUSE post with them to show off your work! Thanks so much for sharing your time and art with me!
Behind the Scenes
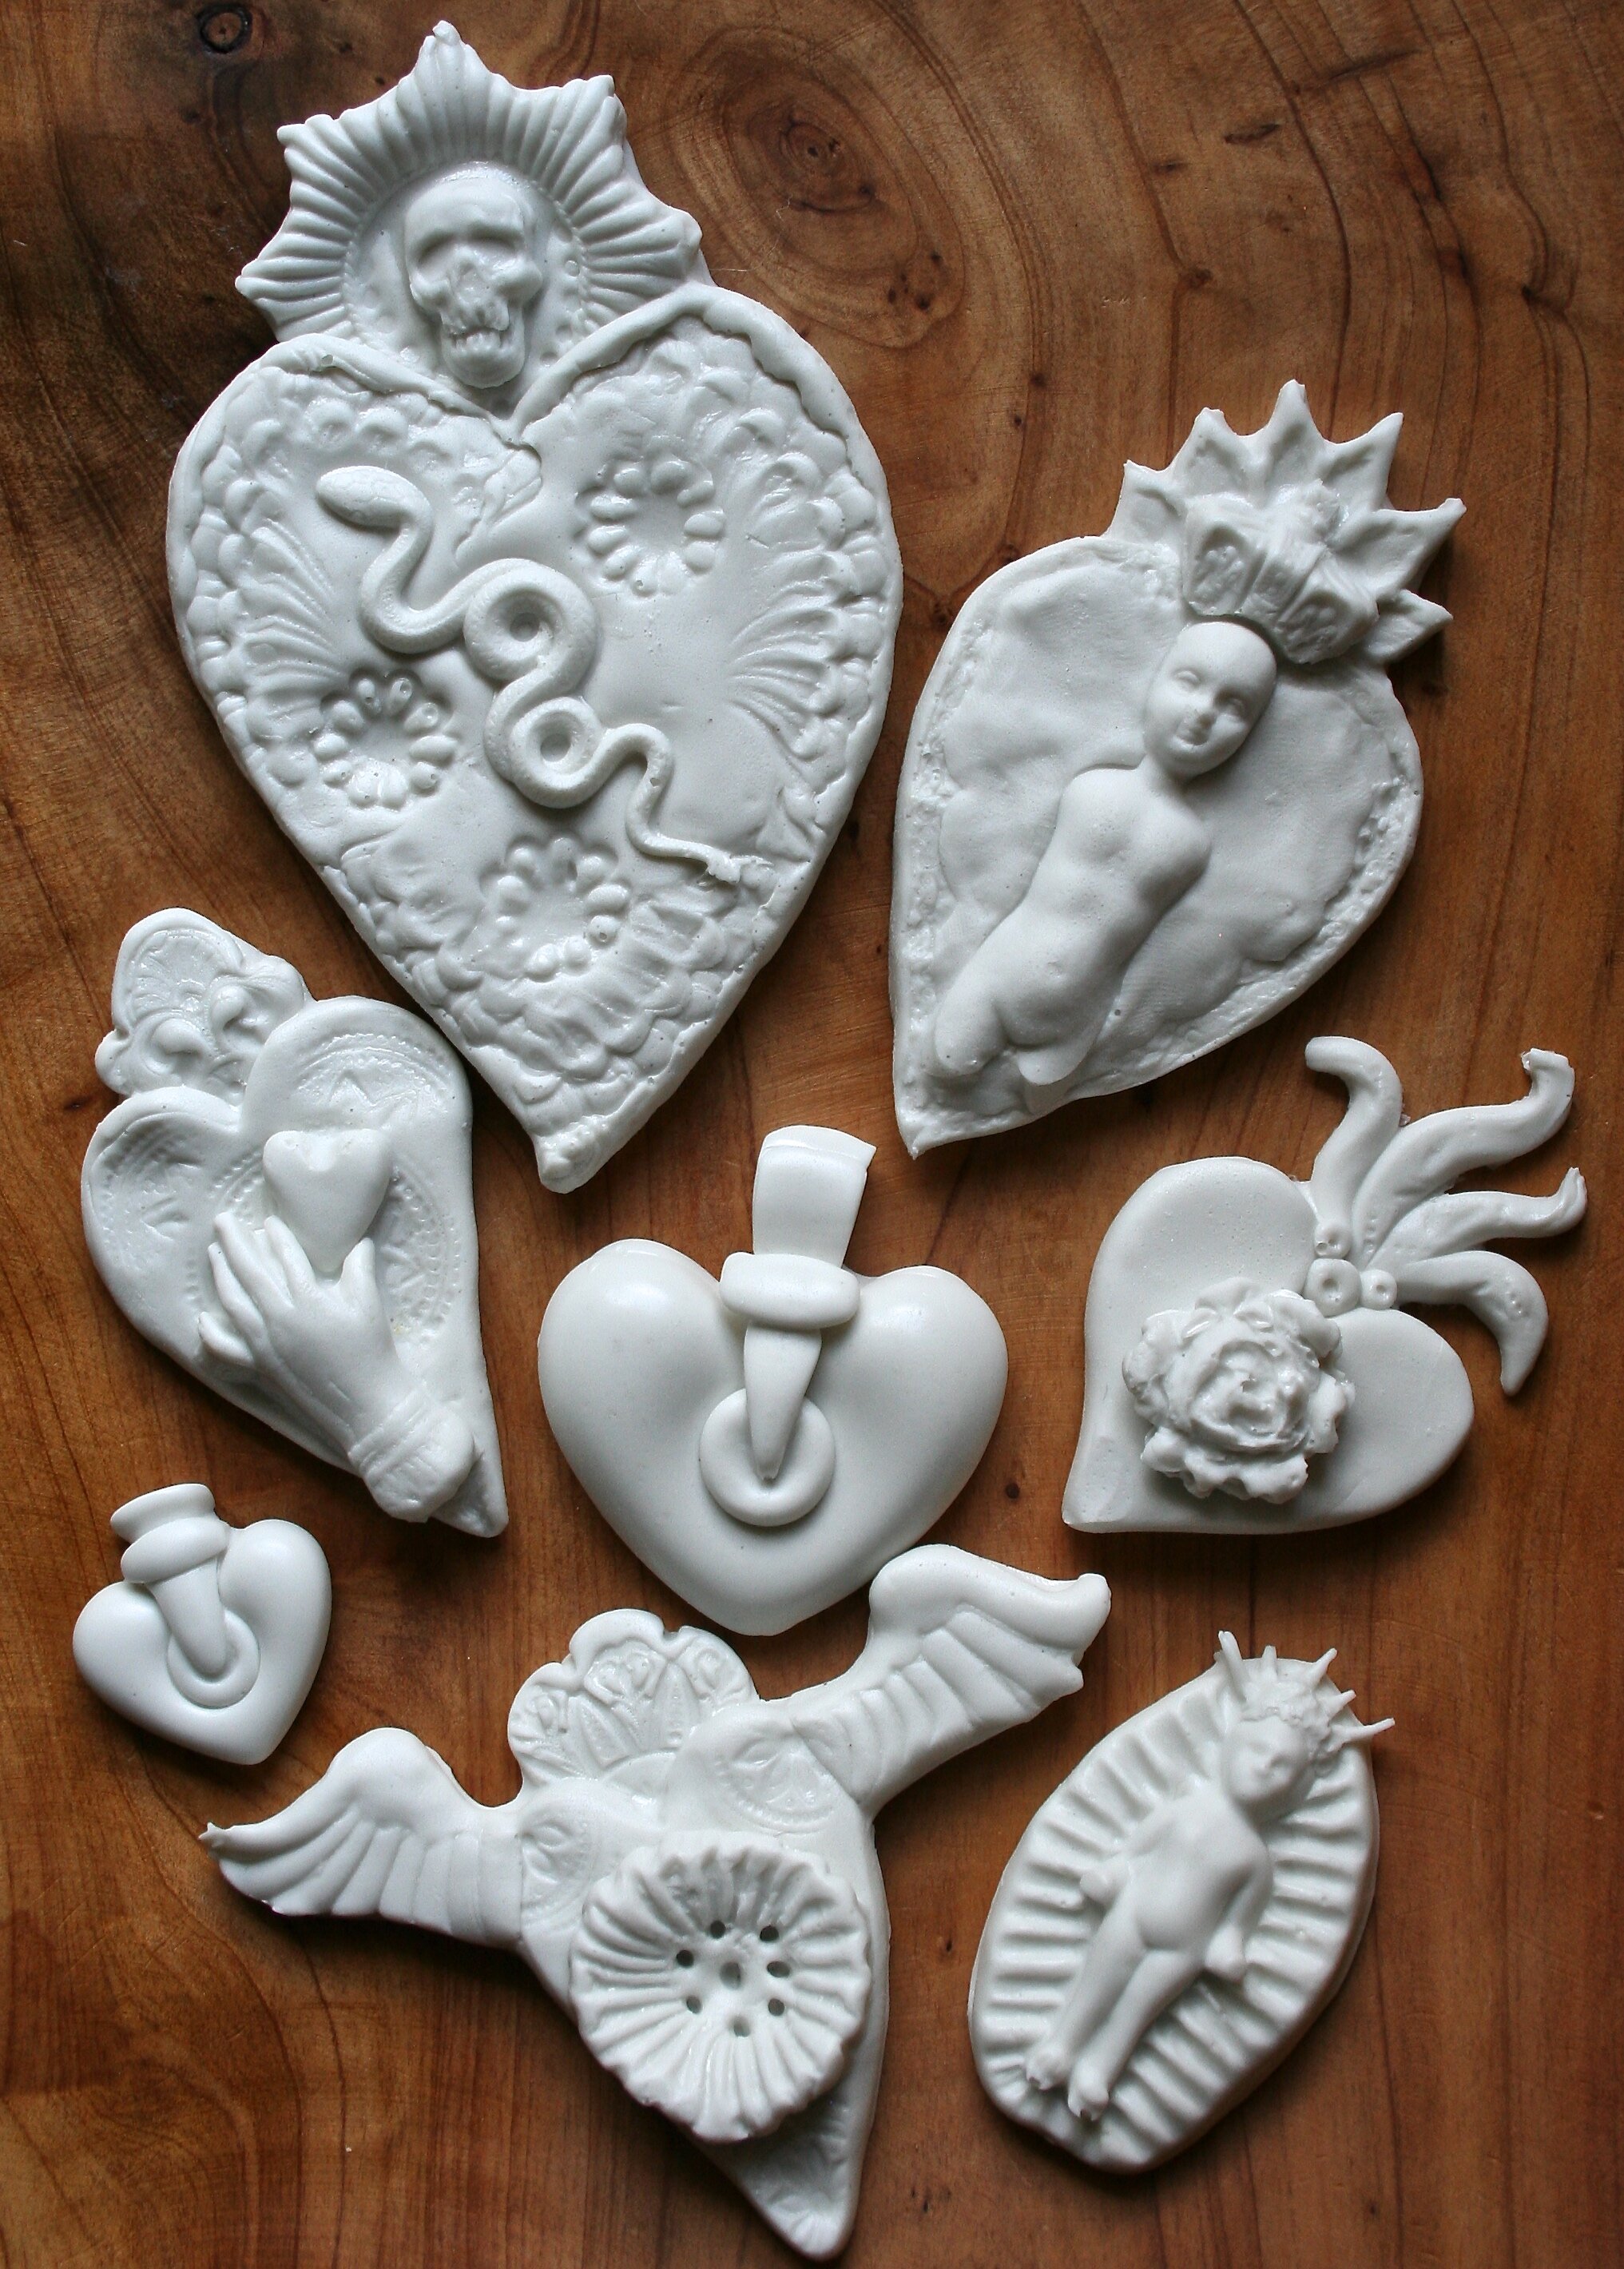
We thought it was about time to share a little behind the scenes of RELICS & ARTIFACTS® with you.

Although we have worked with several large corporations to produce our craft blanks in the past we have come to understand the value of producing our own product right here in the U.S.A.

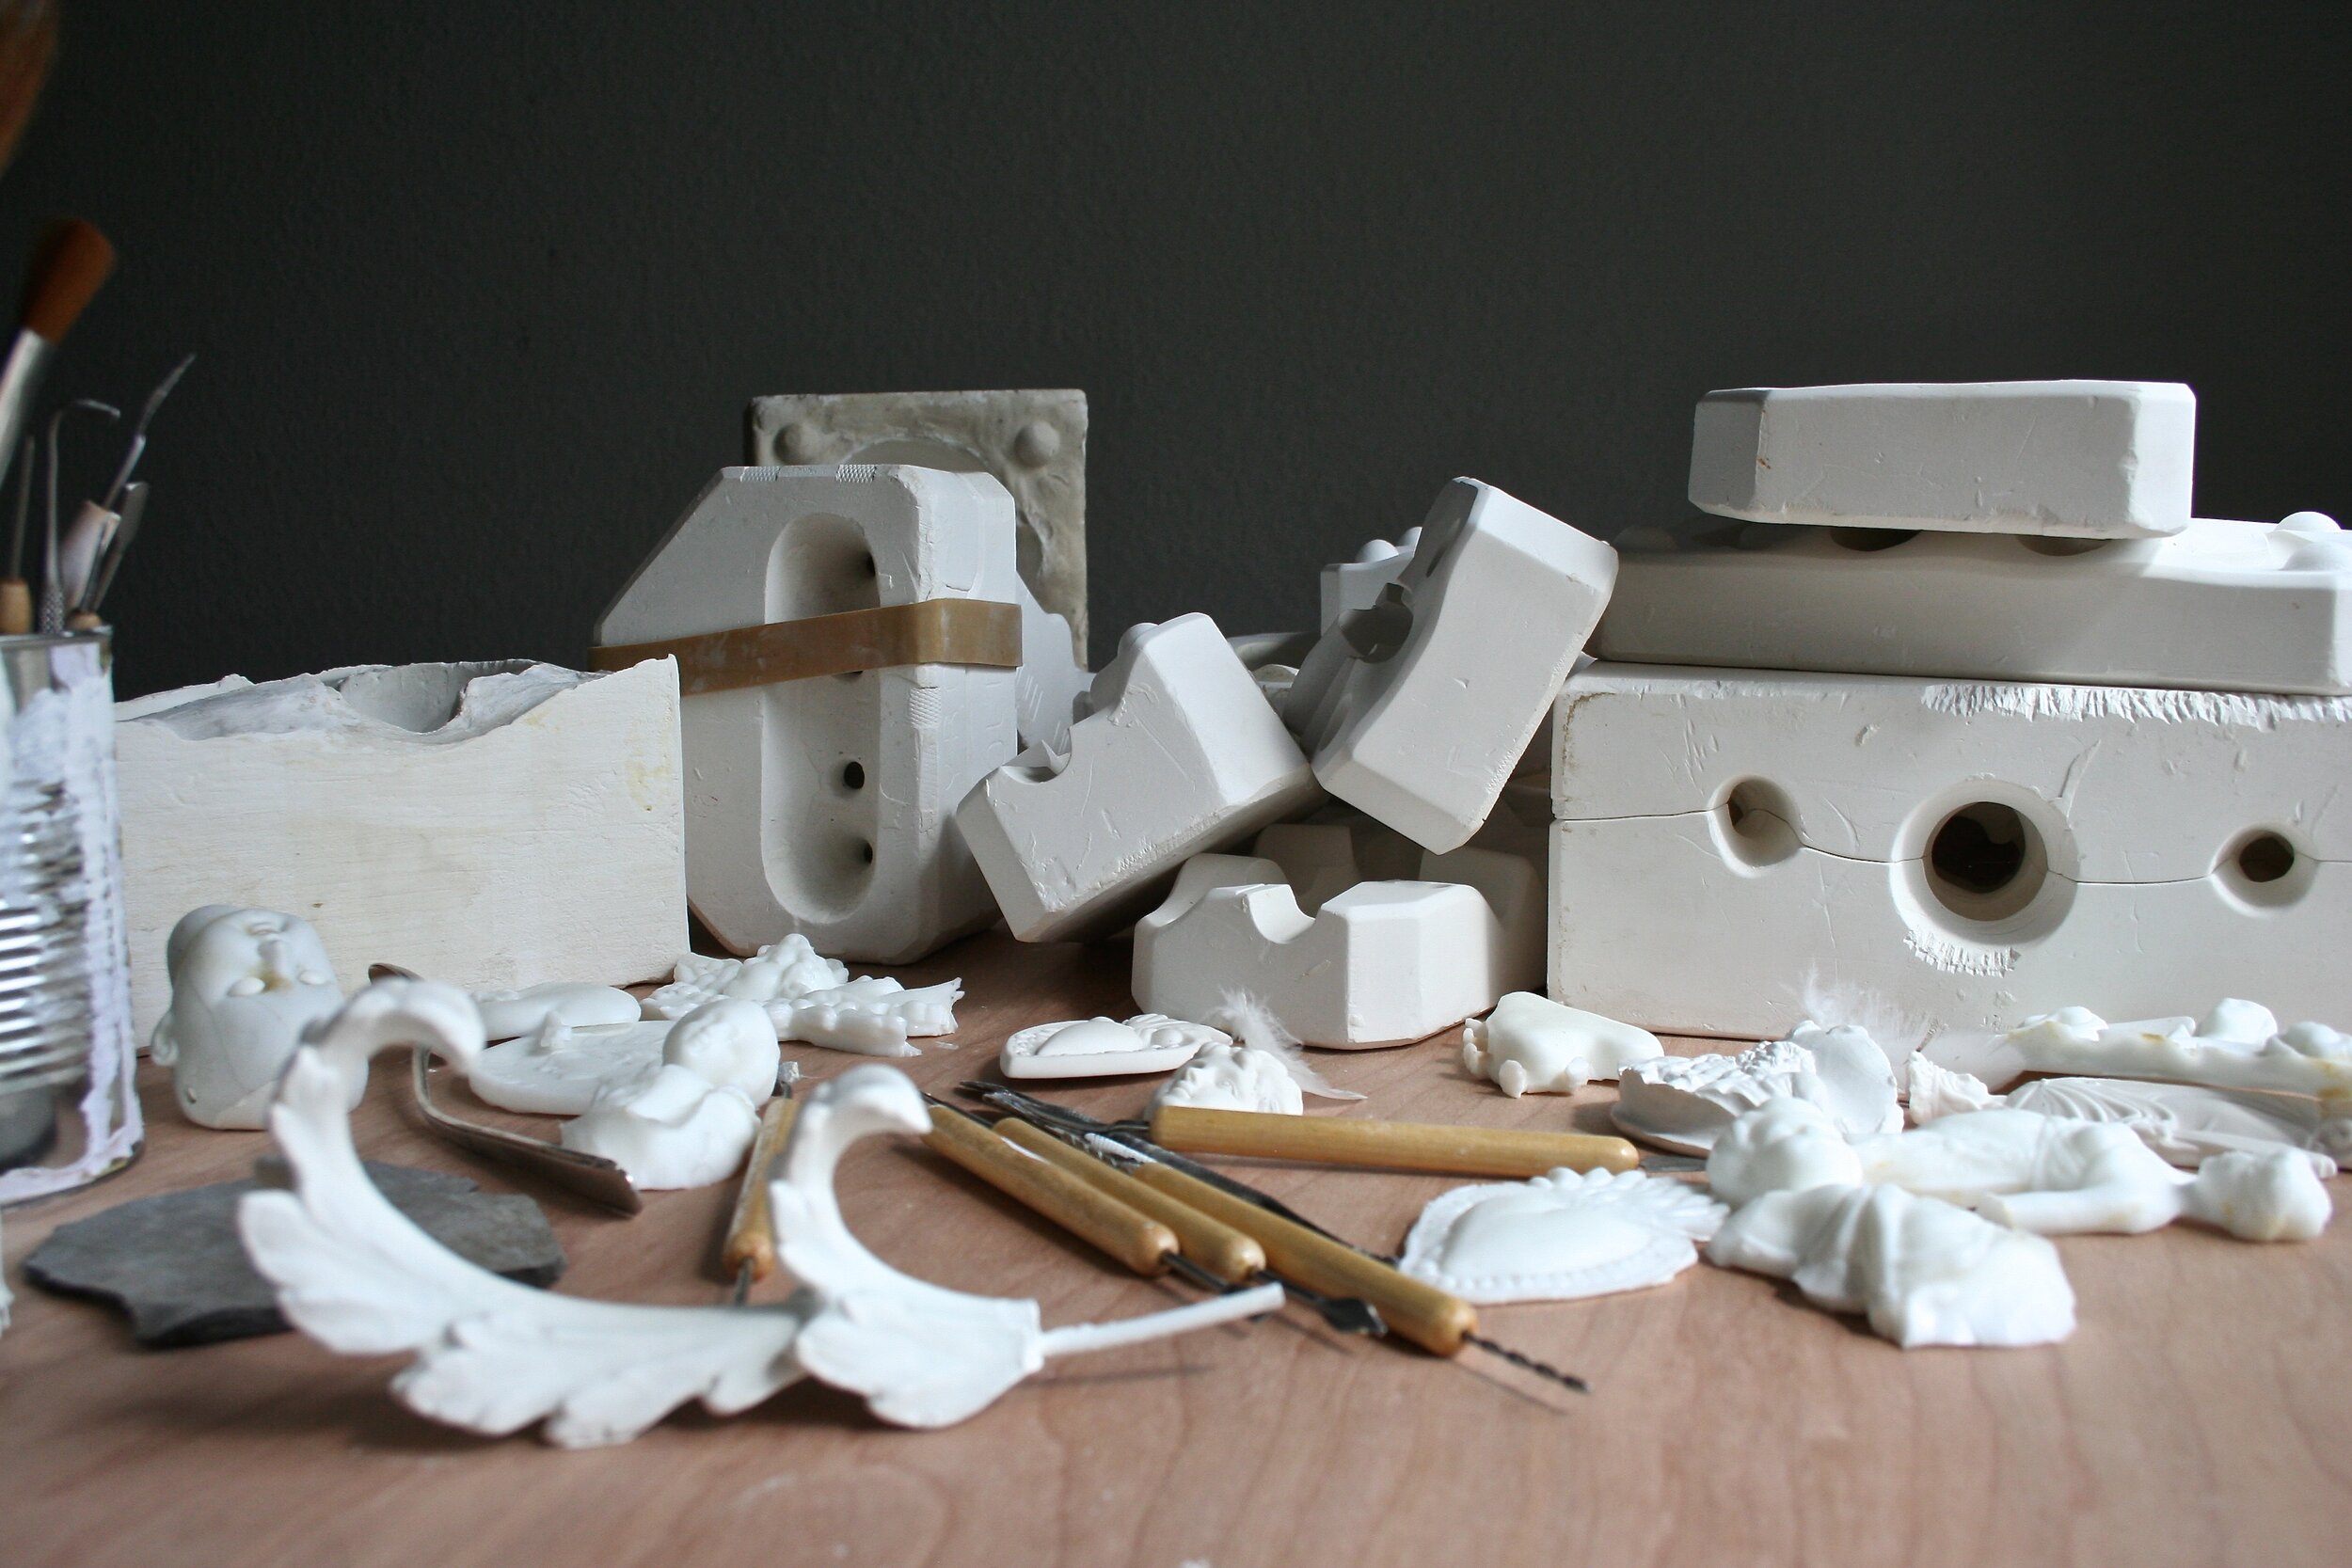
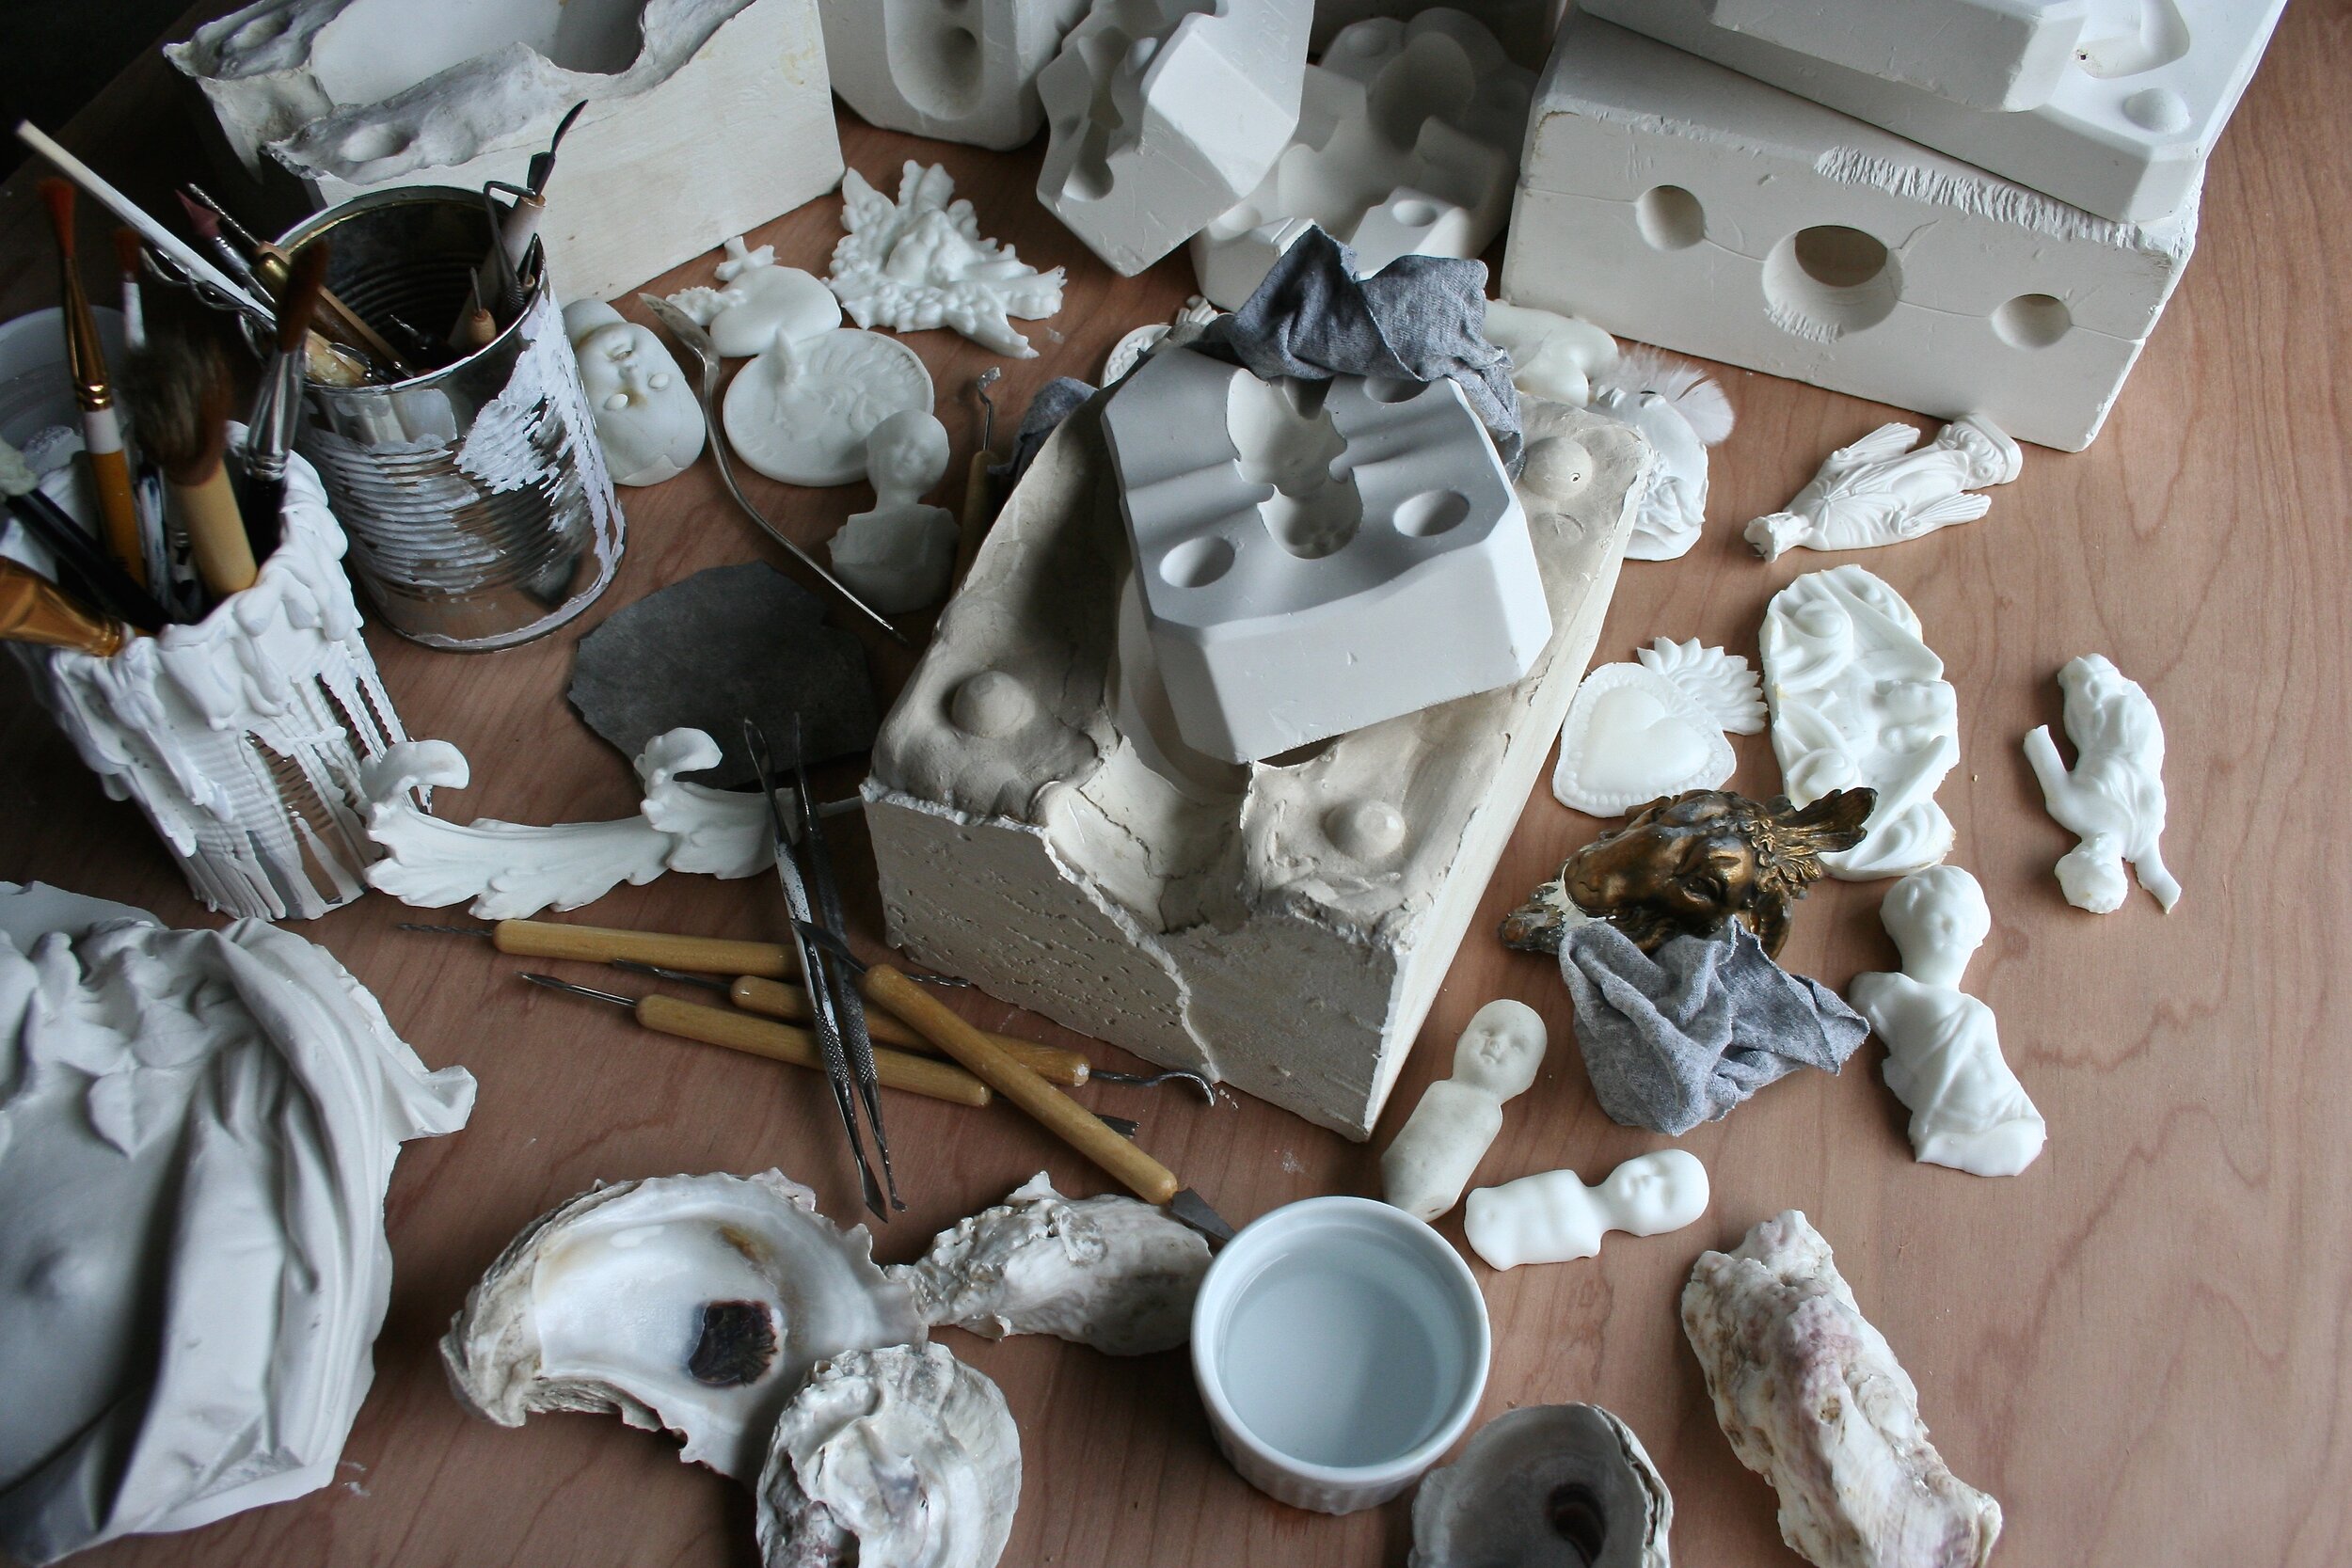
I purposely surround myself with things that inspire me bits and pieces of unusual antiques.

You may recognize parts that eventually end up in the collection.

I really love sitting for hours carefully shaping, sanding and bringing each piece to life, preparing it for the master mold process.

I also sculpt various portions as needed to complete my vision at any given time.

Aside from having a little help in the pouring and cleaning department David and I do everything ourselves.

I do the designing and production, David handles packaging, shipping and the business end.

I like that I am able to work on my own schedule, which carries me late into the night and early morning most days.
We also have the flexibility and freedom to release new designs whenever we want, the old way of having only two releases per year is too stifling to the creative flow.
We use a proprietary Stone Resin blend that gives the surface an eggshell like texture allowing it to take paints and glues really well.

Each blank you receive has been touched by human hands, not machines. I feel that fact lives in the fine details and shows in the end result. A sparkling, crisp, three dimensional blank canvas ready for you to incorporate into your own creations.

Designed, shaped, cast, cleaned packaged and shipped with care directly from us to you.

We appreciate your business. Thank you for five fun years of sharing our creative adventure and cheers to many, many more years to come!

RELICS & ARTIFACTS® Proudly handmade in the U.S.A. ~ Sandra and David
Wishing You a Joyous Eastertide
Creating with inspiration and respect for the past has always been my passion.
Read moreColor inspiration with Muse Milagros C Rivera

Seeing the Lotus blossom come to life while I put it together was awe inspiring. The mechanics, the perfect wood cuts, details upon details took my head for a spin.
Read moreLeatherbound Bohemian Scenes with Milagros C Rivera

I'm blown away by the intricate designs on Sandra's new Tapestries collection. There's so much to explore in each design, specially the Bohemian scenes!
Read moreFuse Day 7- Homage to Frida by Milagros C. Rivera
I hope you're having fun as the Collaboration between the Relics and Artifacts Ambassadors and the Design Team from RubberMoon combine their artistc flair to bring you unique takes on both companies.
Read moreIt's All In The Details

I get enjoyment from many different aspects of Creating.

Sometimes I have a plan and do quick sketches to get my ideas down on paper and while I have dozens of sketchbooks filled with project drawings and ideas, it would take me years to actually make all the pieces I've designed and want to create.
I love collecting, gathering and sorting through my antique materials.

Taking time to try out different arrangements until I find the perfect piece and placement, you know it's the piece that looks as though it were made to go in that spot!
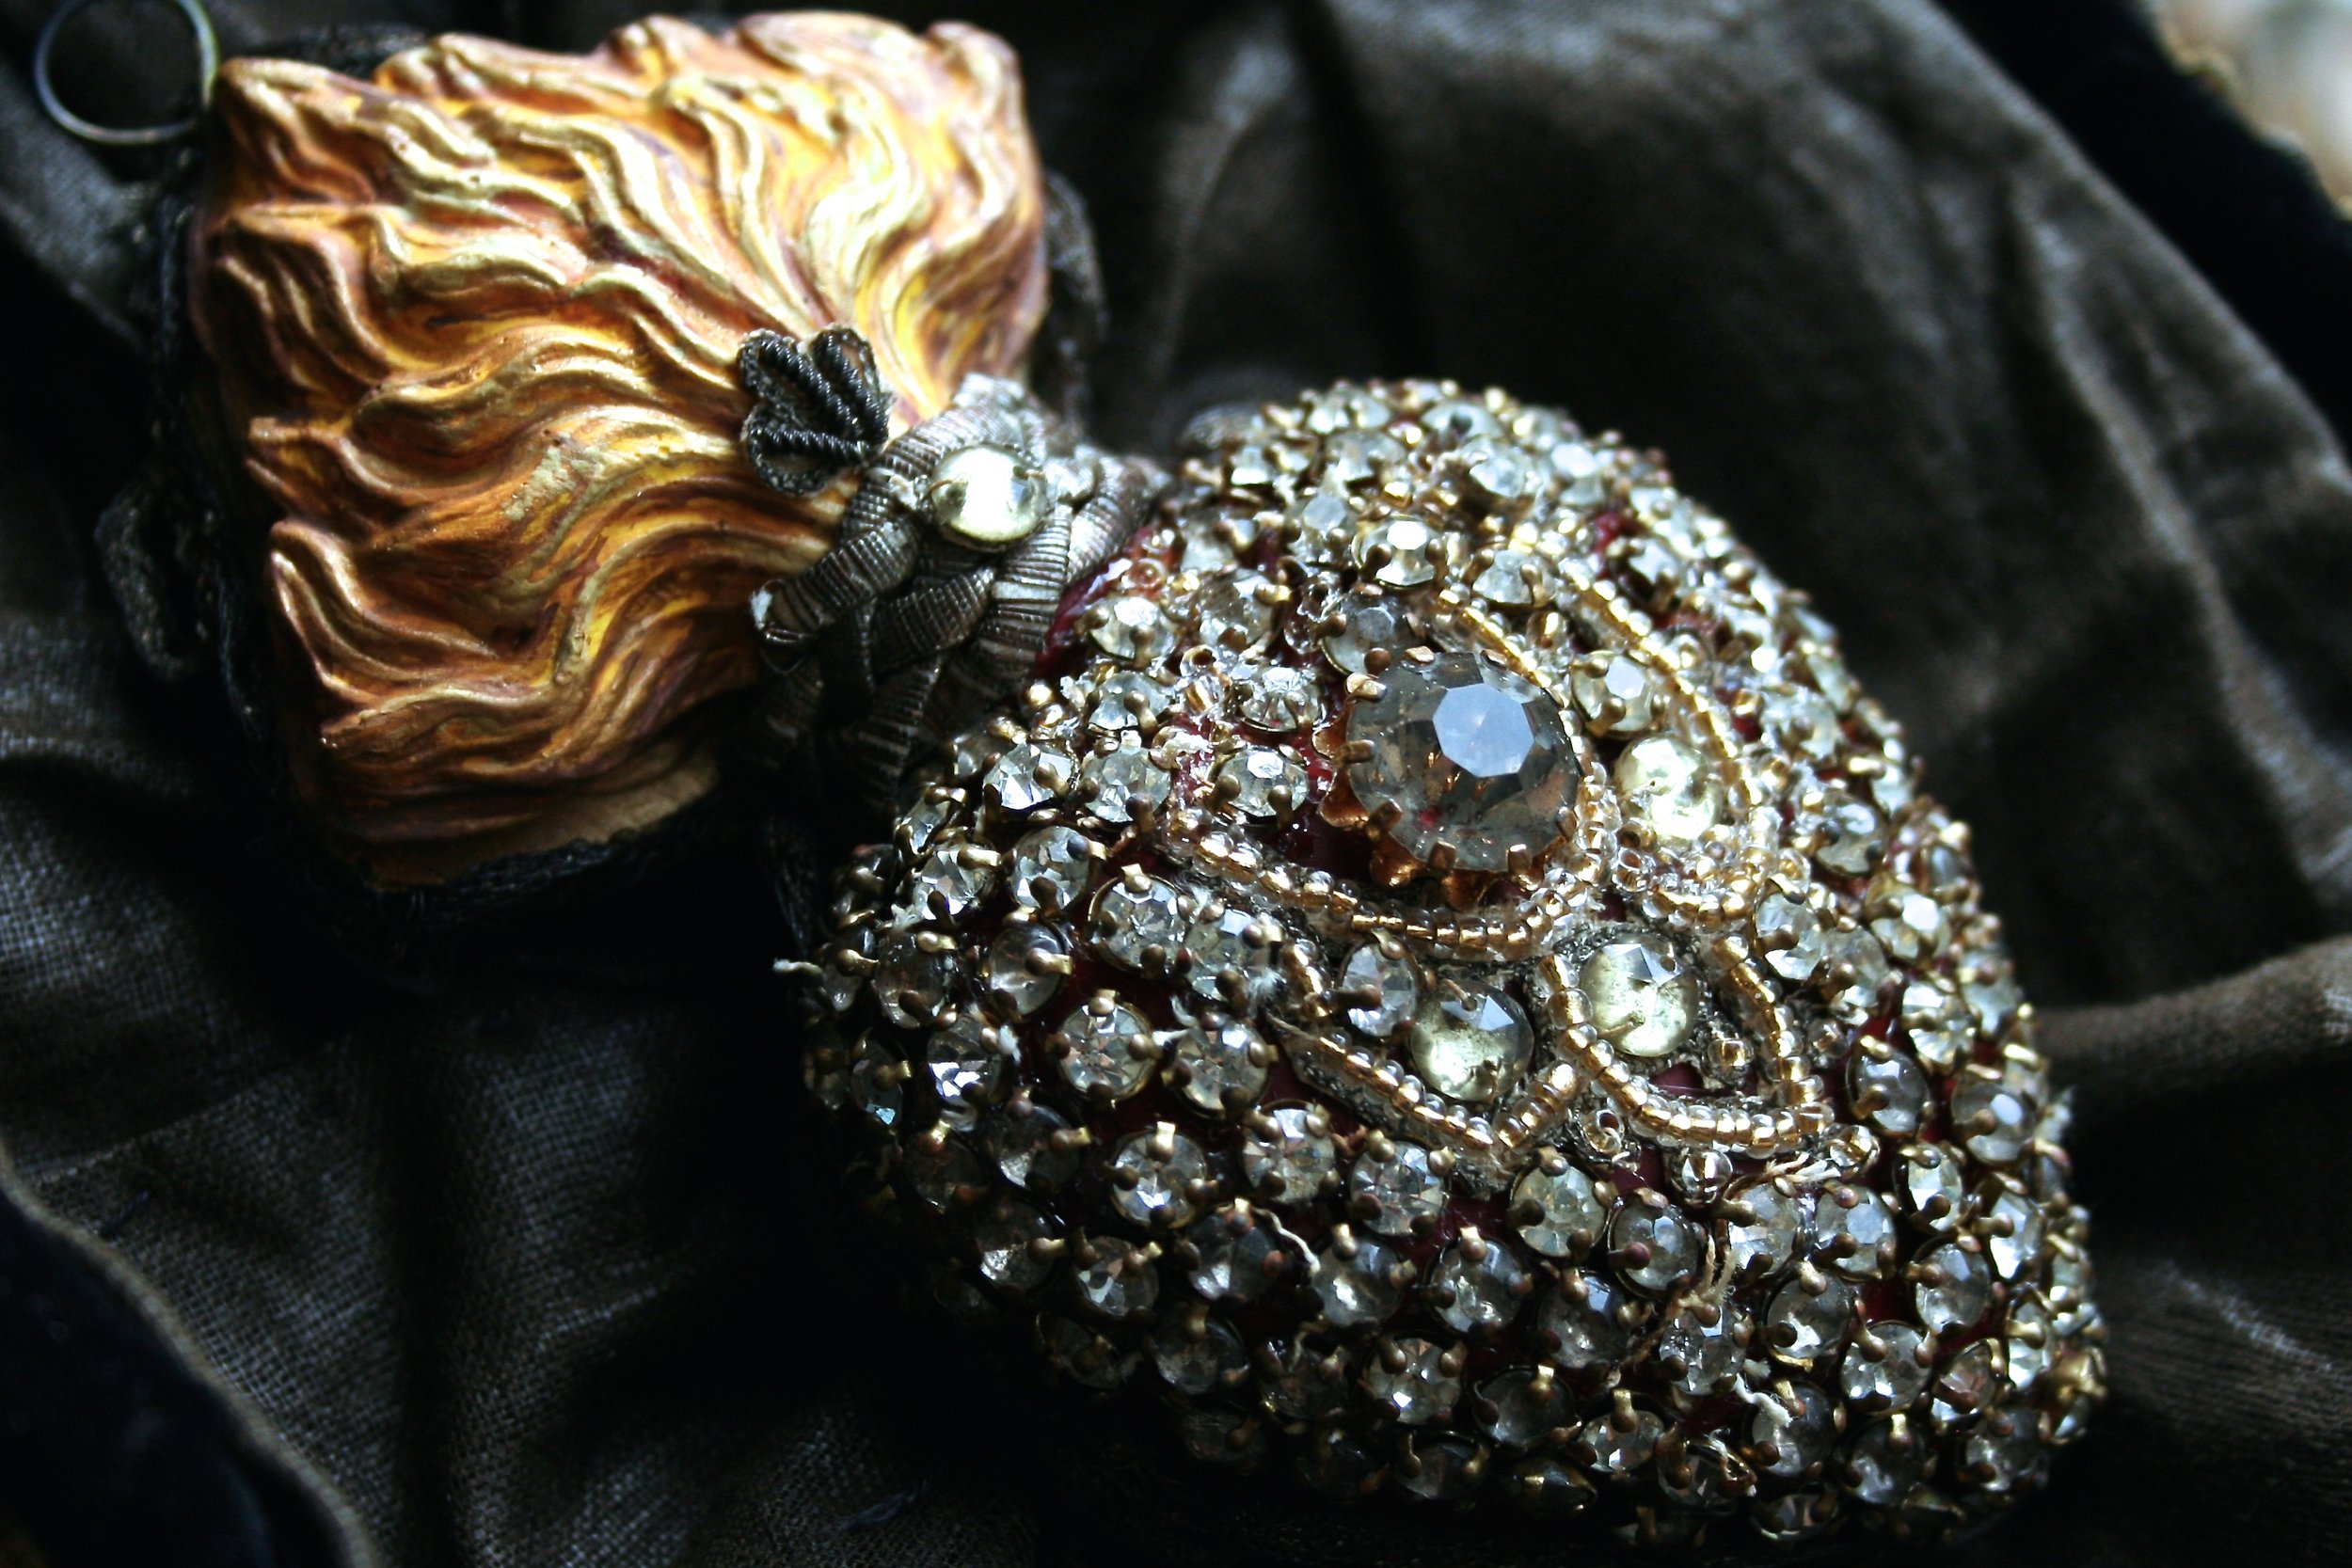
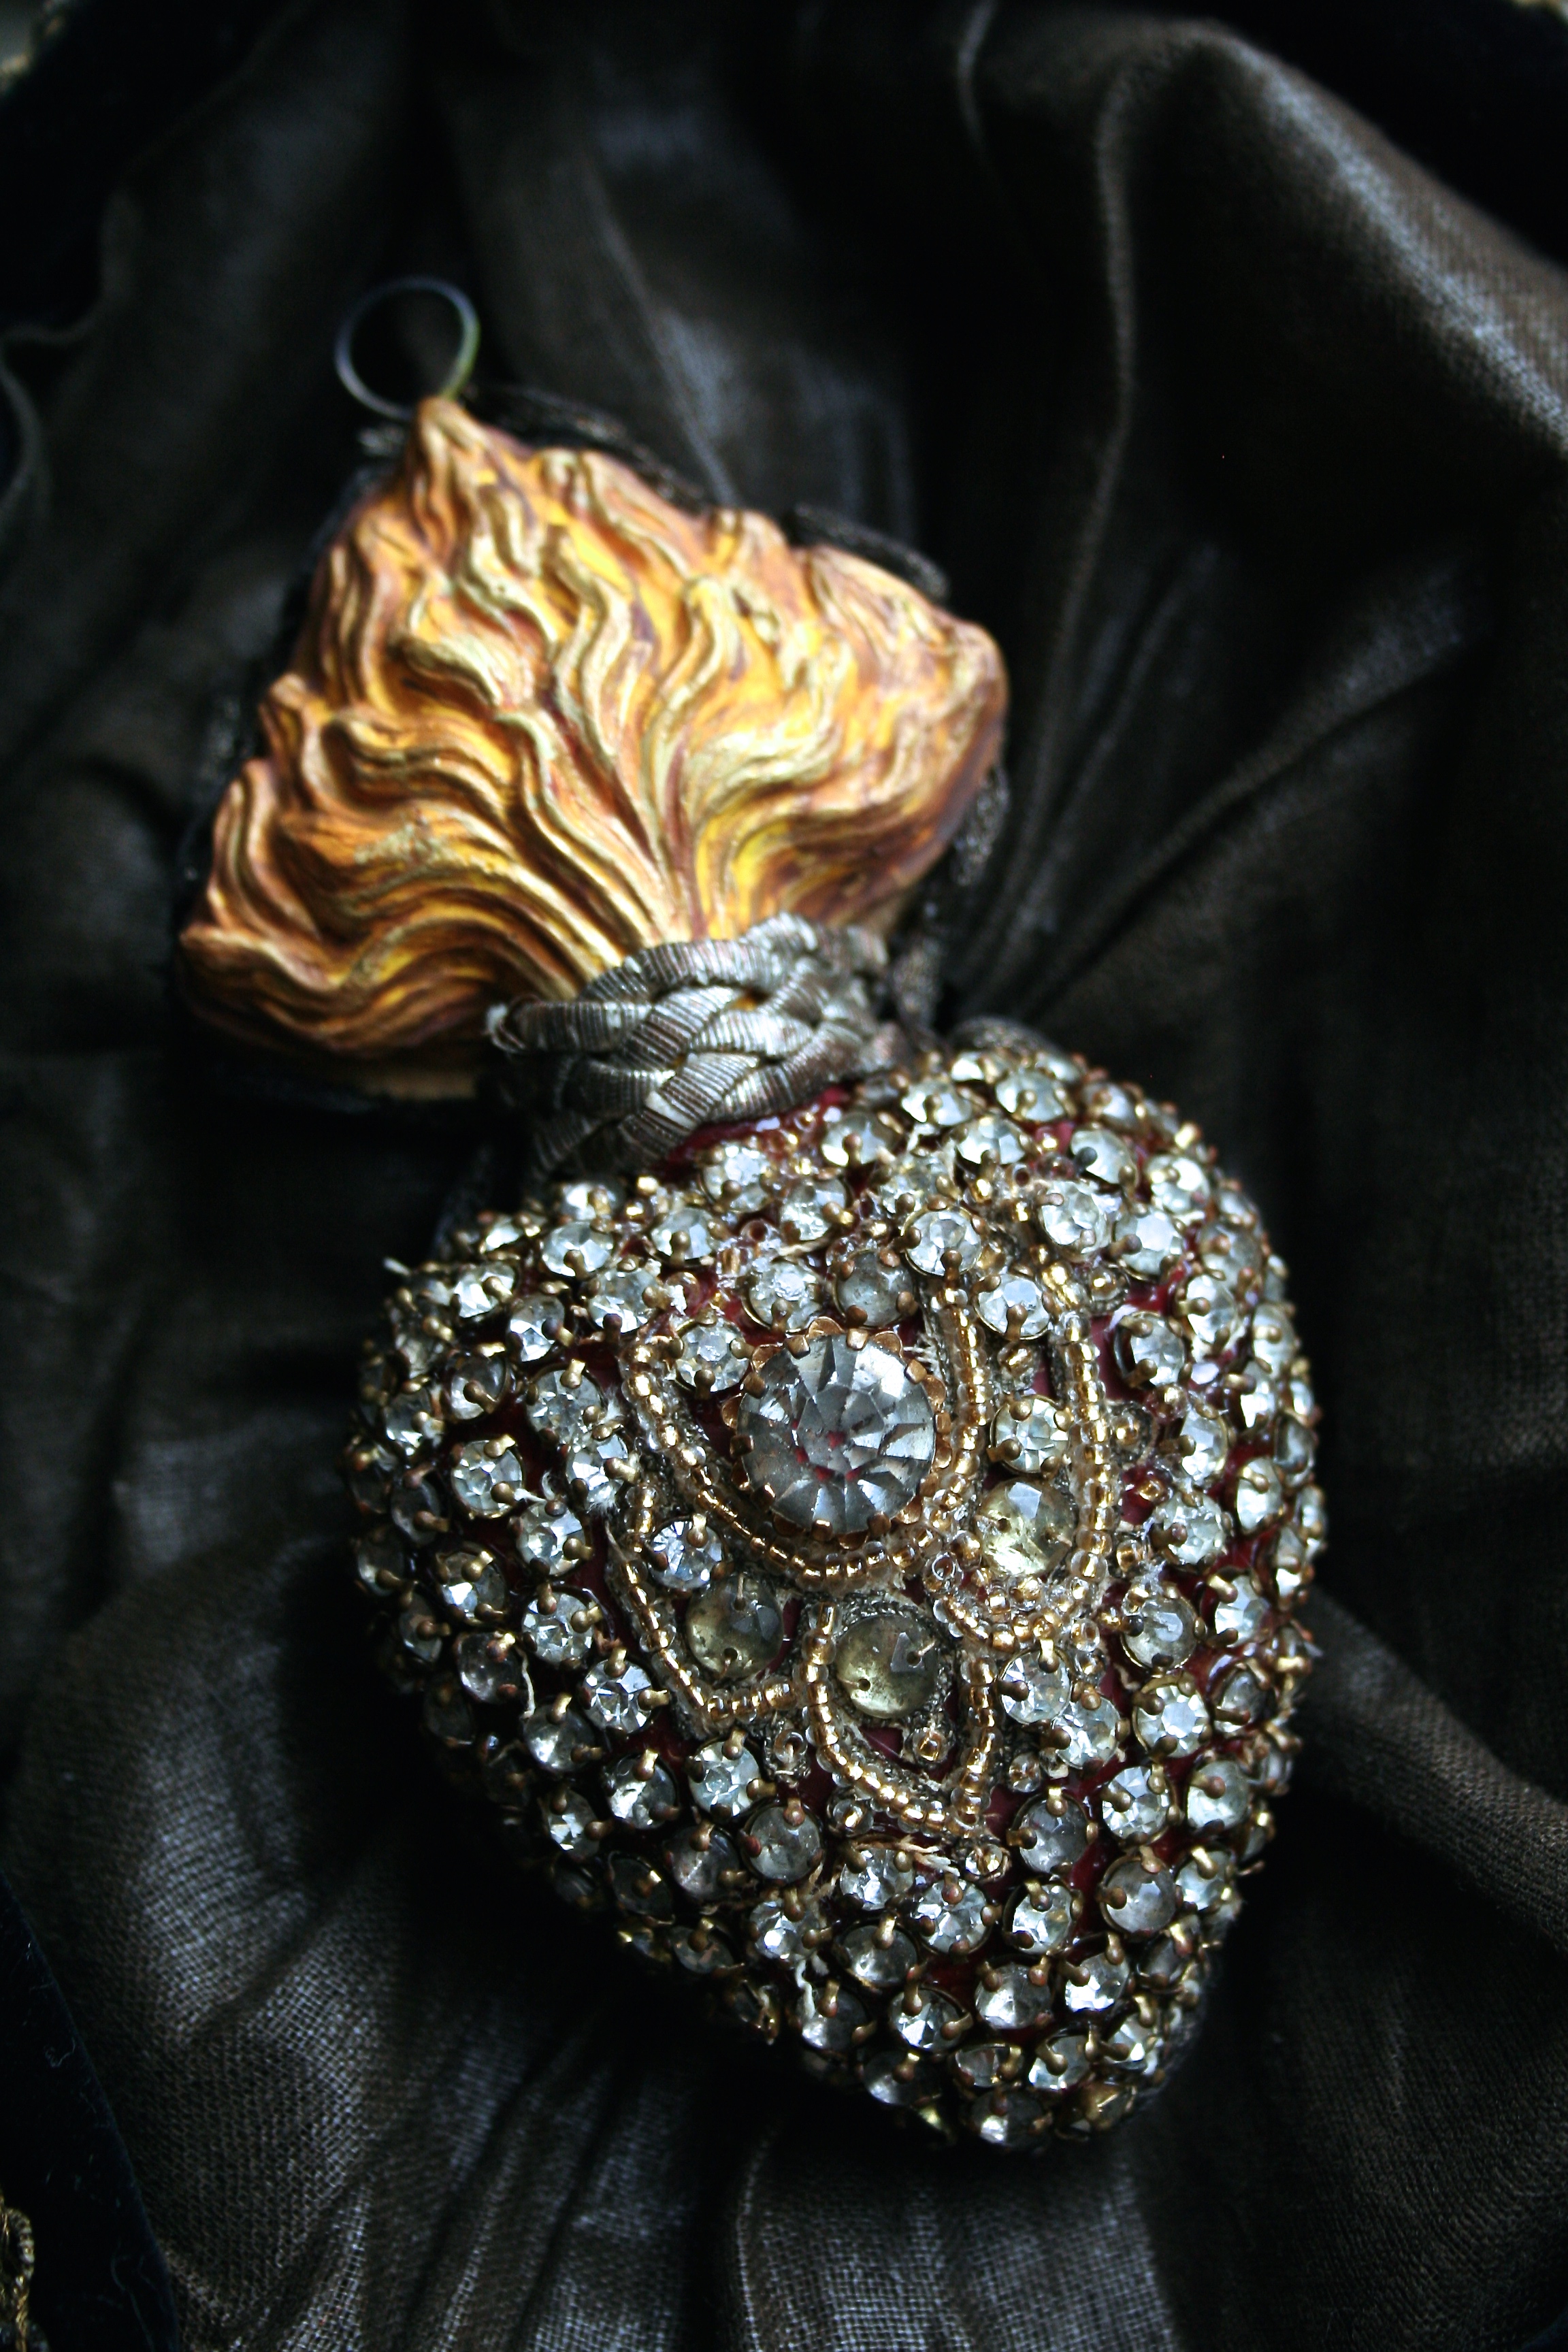
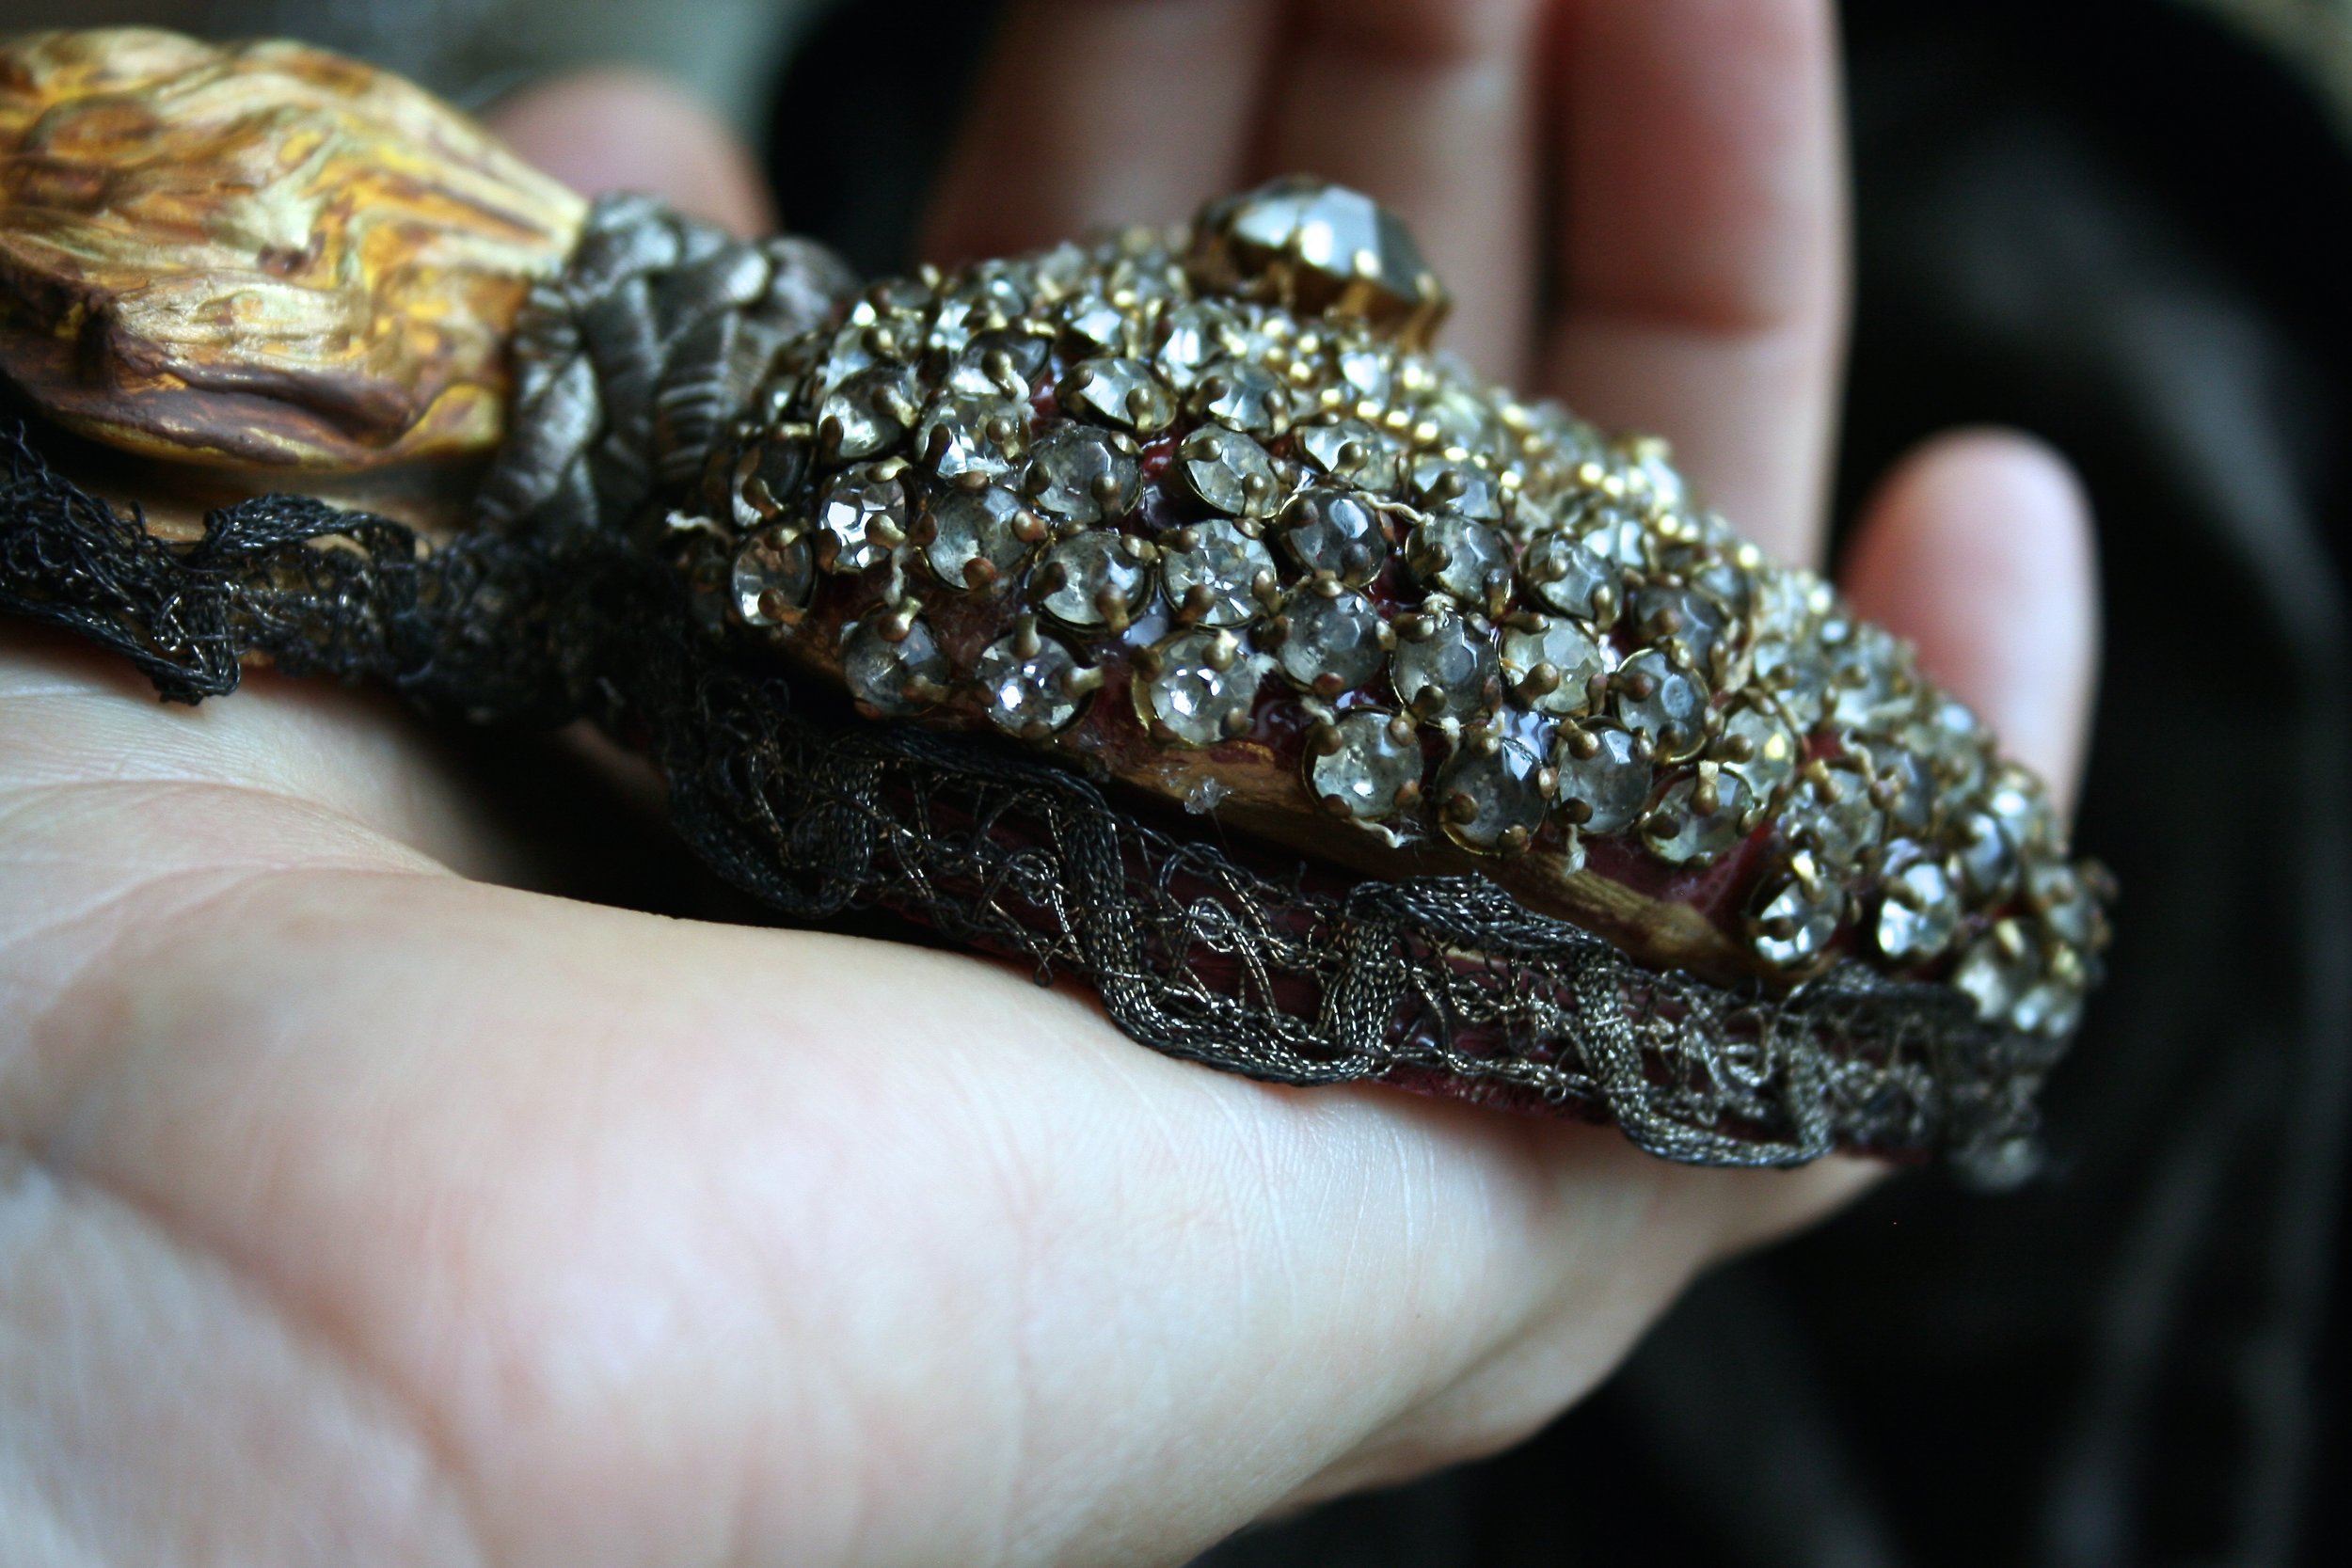
The golden seed beads and bouillon trims you see here came off of a 1920's Flapper dress and all of the set stones are actually "paste" stones from the 1700's. Paste is a term they used for a certain kind of highly refractive lead glass that was hand cut, faceted and then polished to resemble real gem stones.
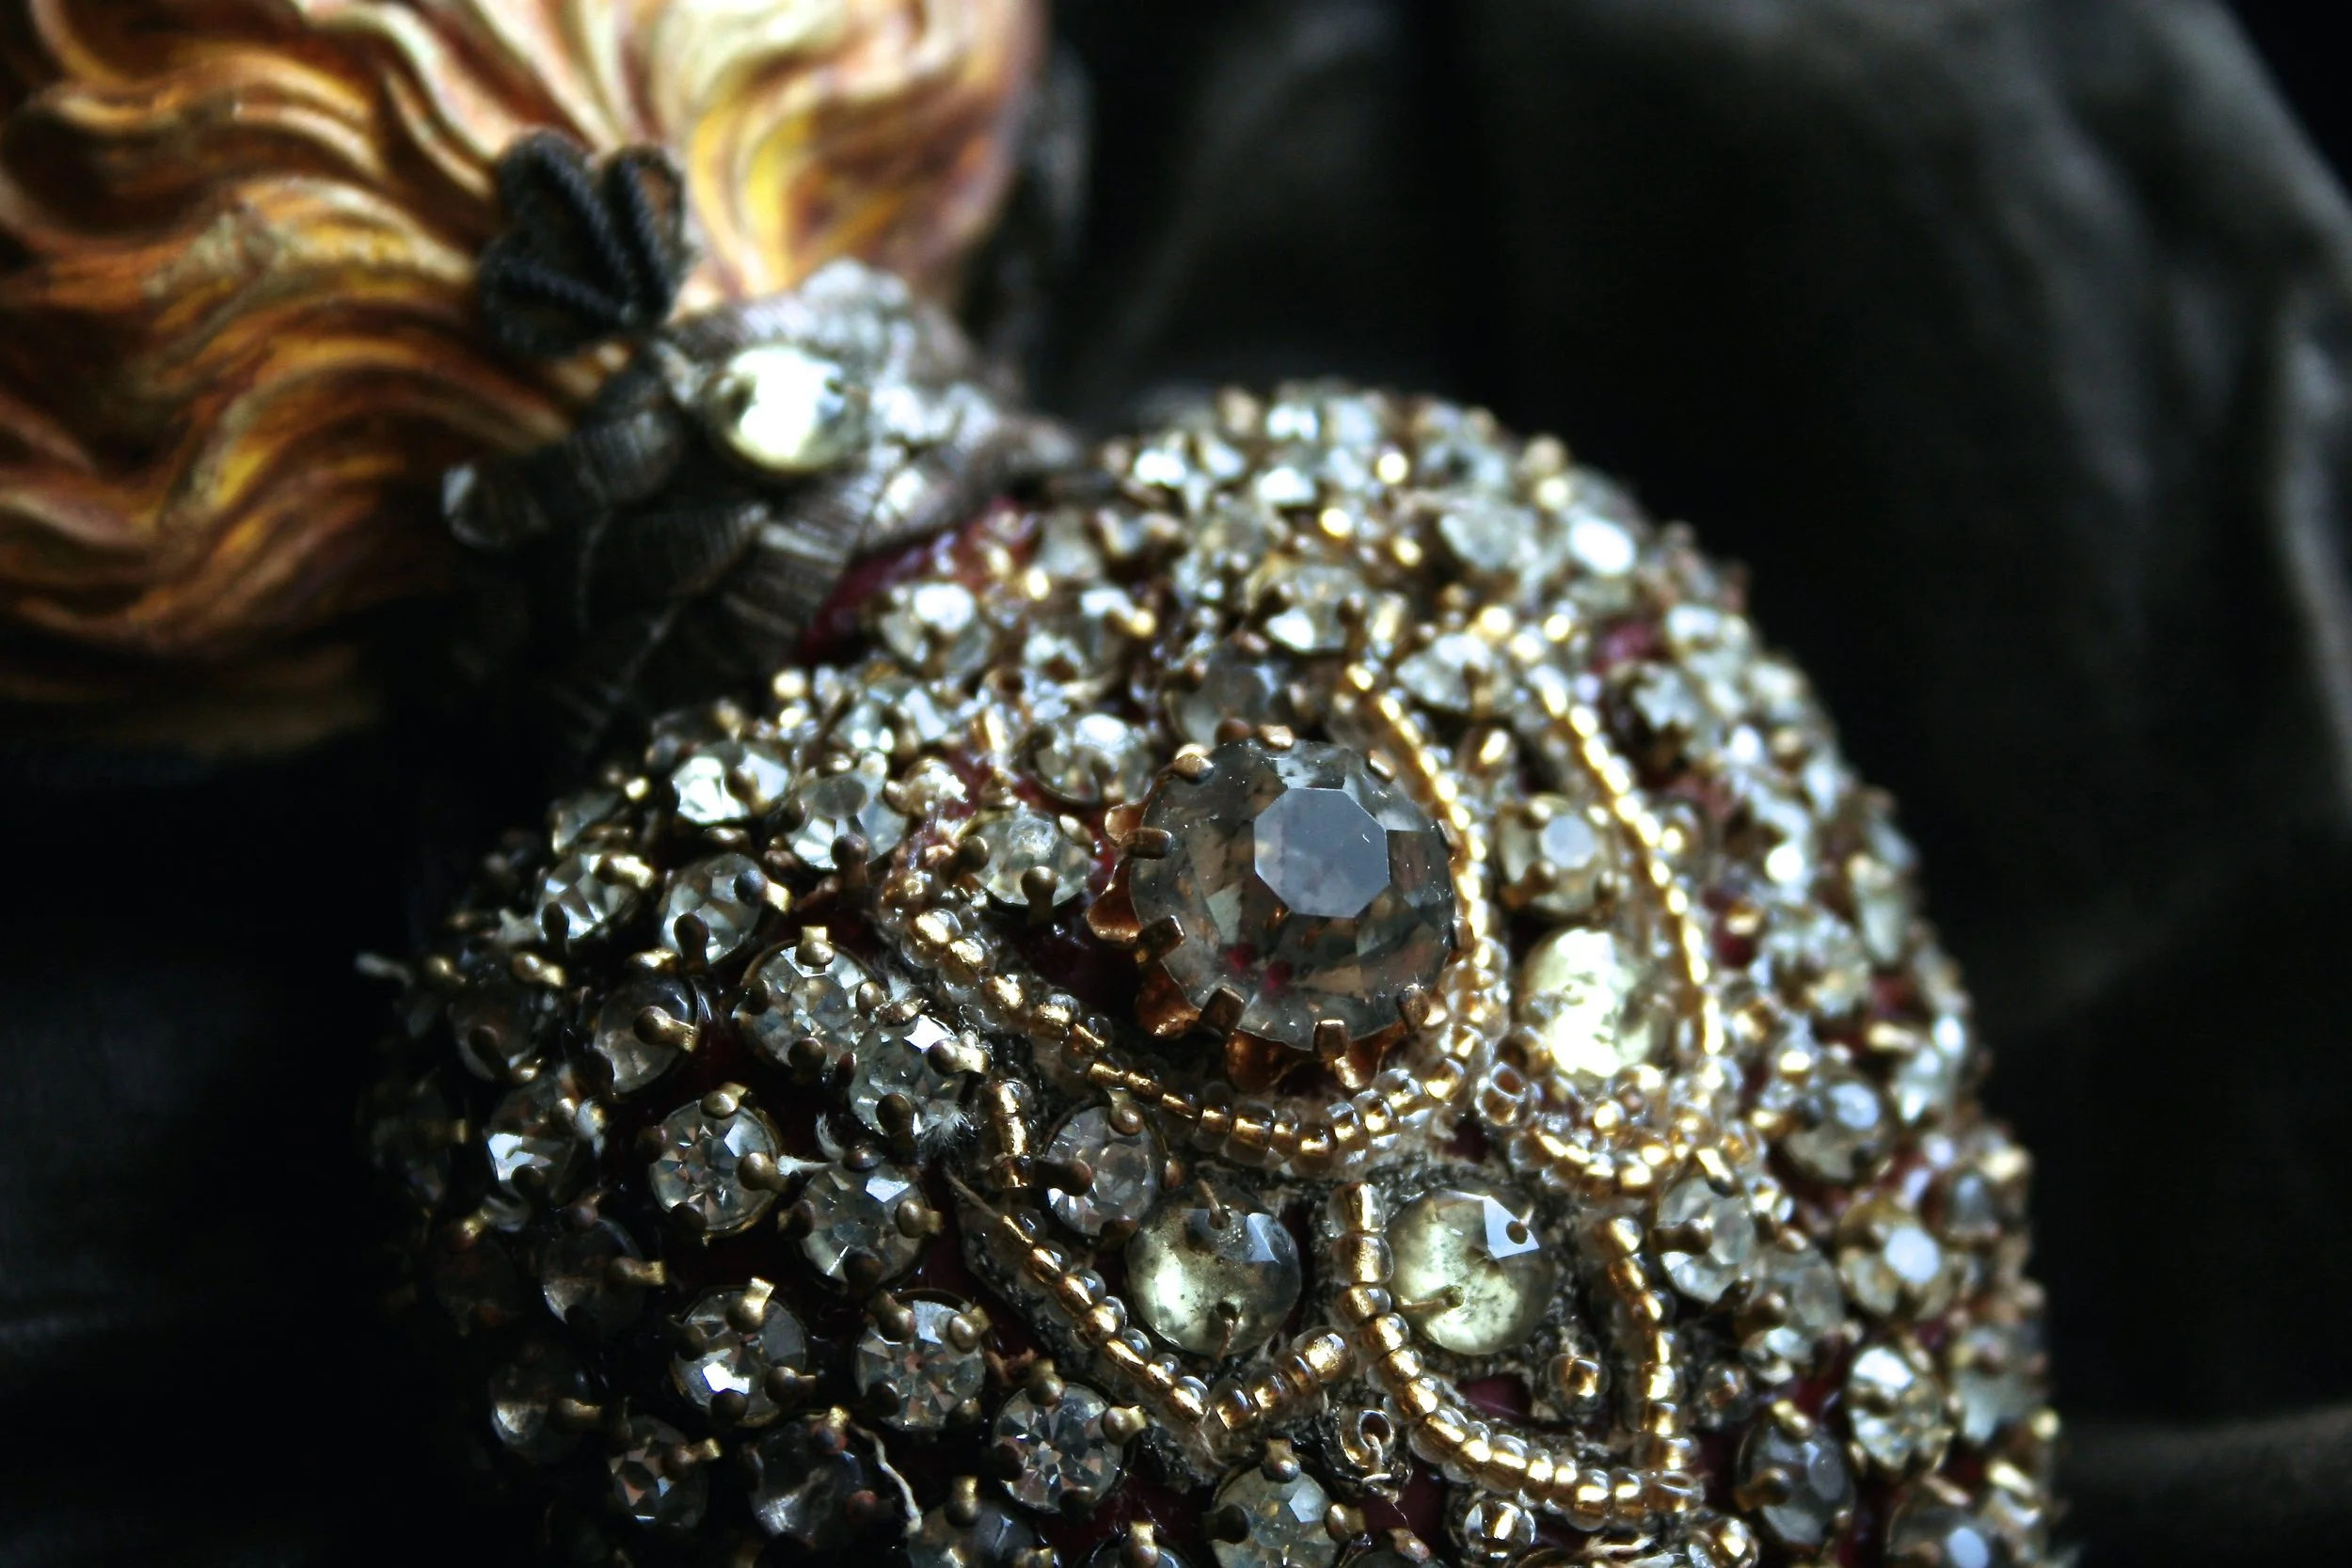
The large center stone is also early paste. These stones are getting harder to find all the time.
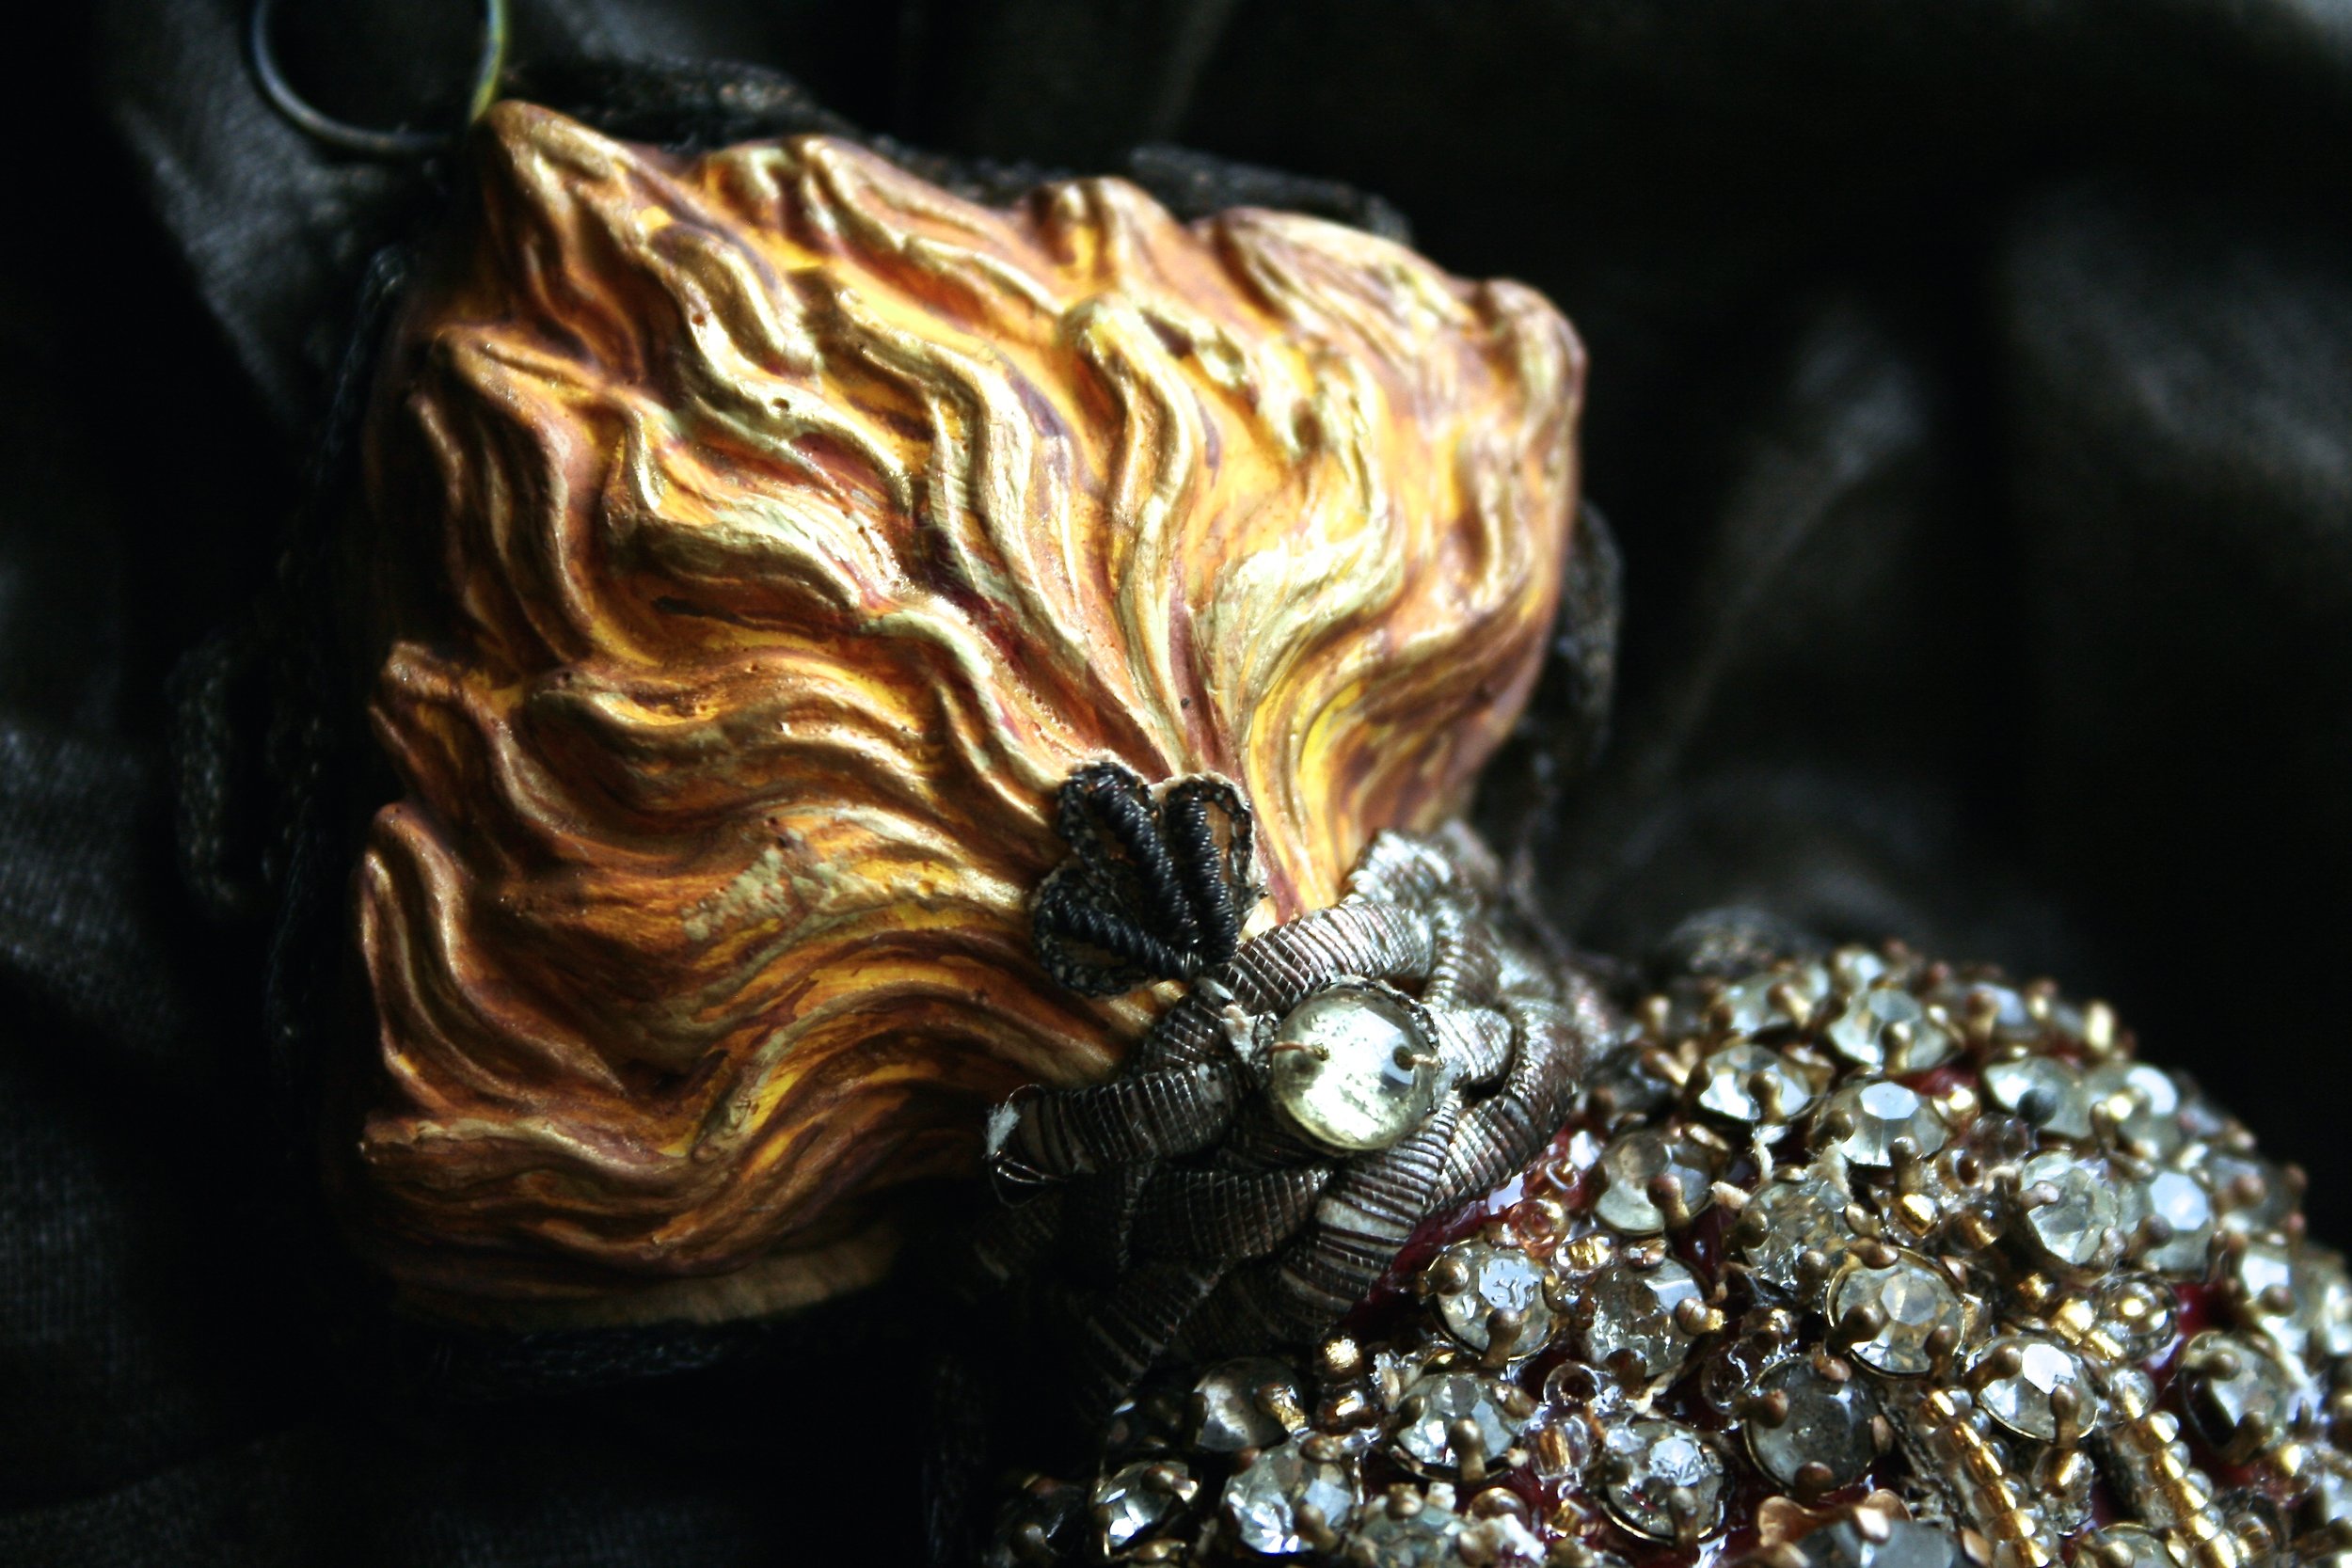
In order to get just the right look on the flames I've layered several different tones of yellow from mustard to butter, sun to sunset, all topped with little highlights of metallic gold.

When I'm hunting for antique pieces it's the details that make all the difference for me. The thing I go crazy for on these stones is the setting, look closely, each setting has a little dot of round metal that holds the stone securely, isn't it beautiful?! And just so unique.
When the last bit of embellishment has been applied another aspect of being a maker is ready to happen. Photographing the finished piece is a much fun for me as making it was. It's an expedition, traveling around the object, camera in hand, peering through the lens just waiting for the right angle to reveal itself.

And lastly the satisfaction I get when actually wearing a piece I made from beginning to end. The sense of pride and accomplishment means so much to me, its especially gratifying in times of unrest in the world.

I never take for granted the act of creation. Makers are the journey takers, the adventures, the wanders and the experimenters. Thats who we are, we explore, we observe, we absorb, we interpret, we express and we contribute.
RELICS & ARTIFACTS® Ancient Heart (heart and flame)
RELICS & ARTIFACTS® Rising Spirit V(wood support back)
E6000 Adhesive/Tacky Glue
Acrylic Paints Yellow Tones/Gold/Brick Red
Necklace chain
Antique trims/Camera
"Live With the Tribe" Featuring RELICS & ARTIFACTS® CREATOR Sandra Evertson

Join us in the Relics & Artifacts Tribe on Facebook for a very special "Live with the Tribe" feature! Your host will be none other than Relics & Artifacts® creator and inspirational extraordinaire, Sandra Evertson.
Read moreCassiopeia's Throne
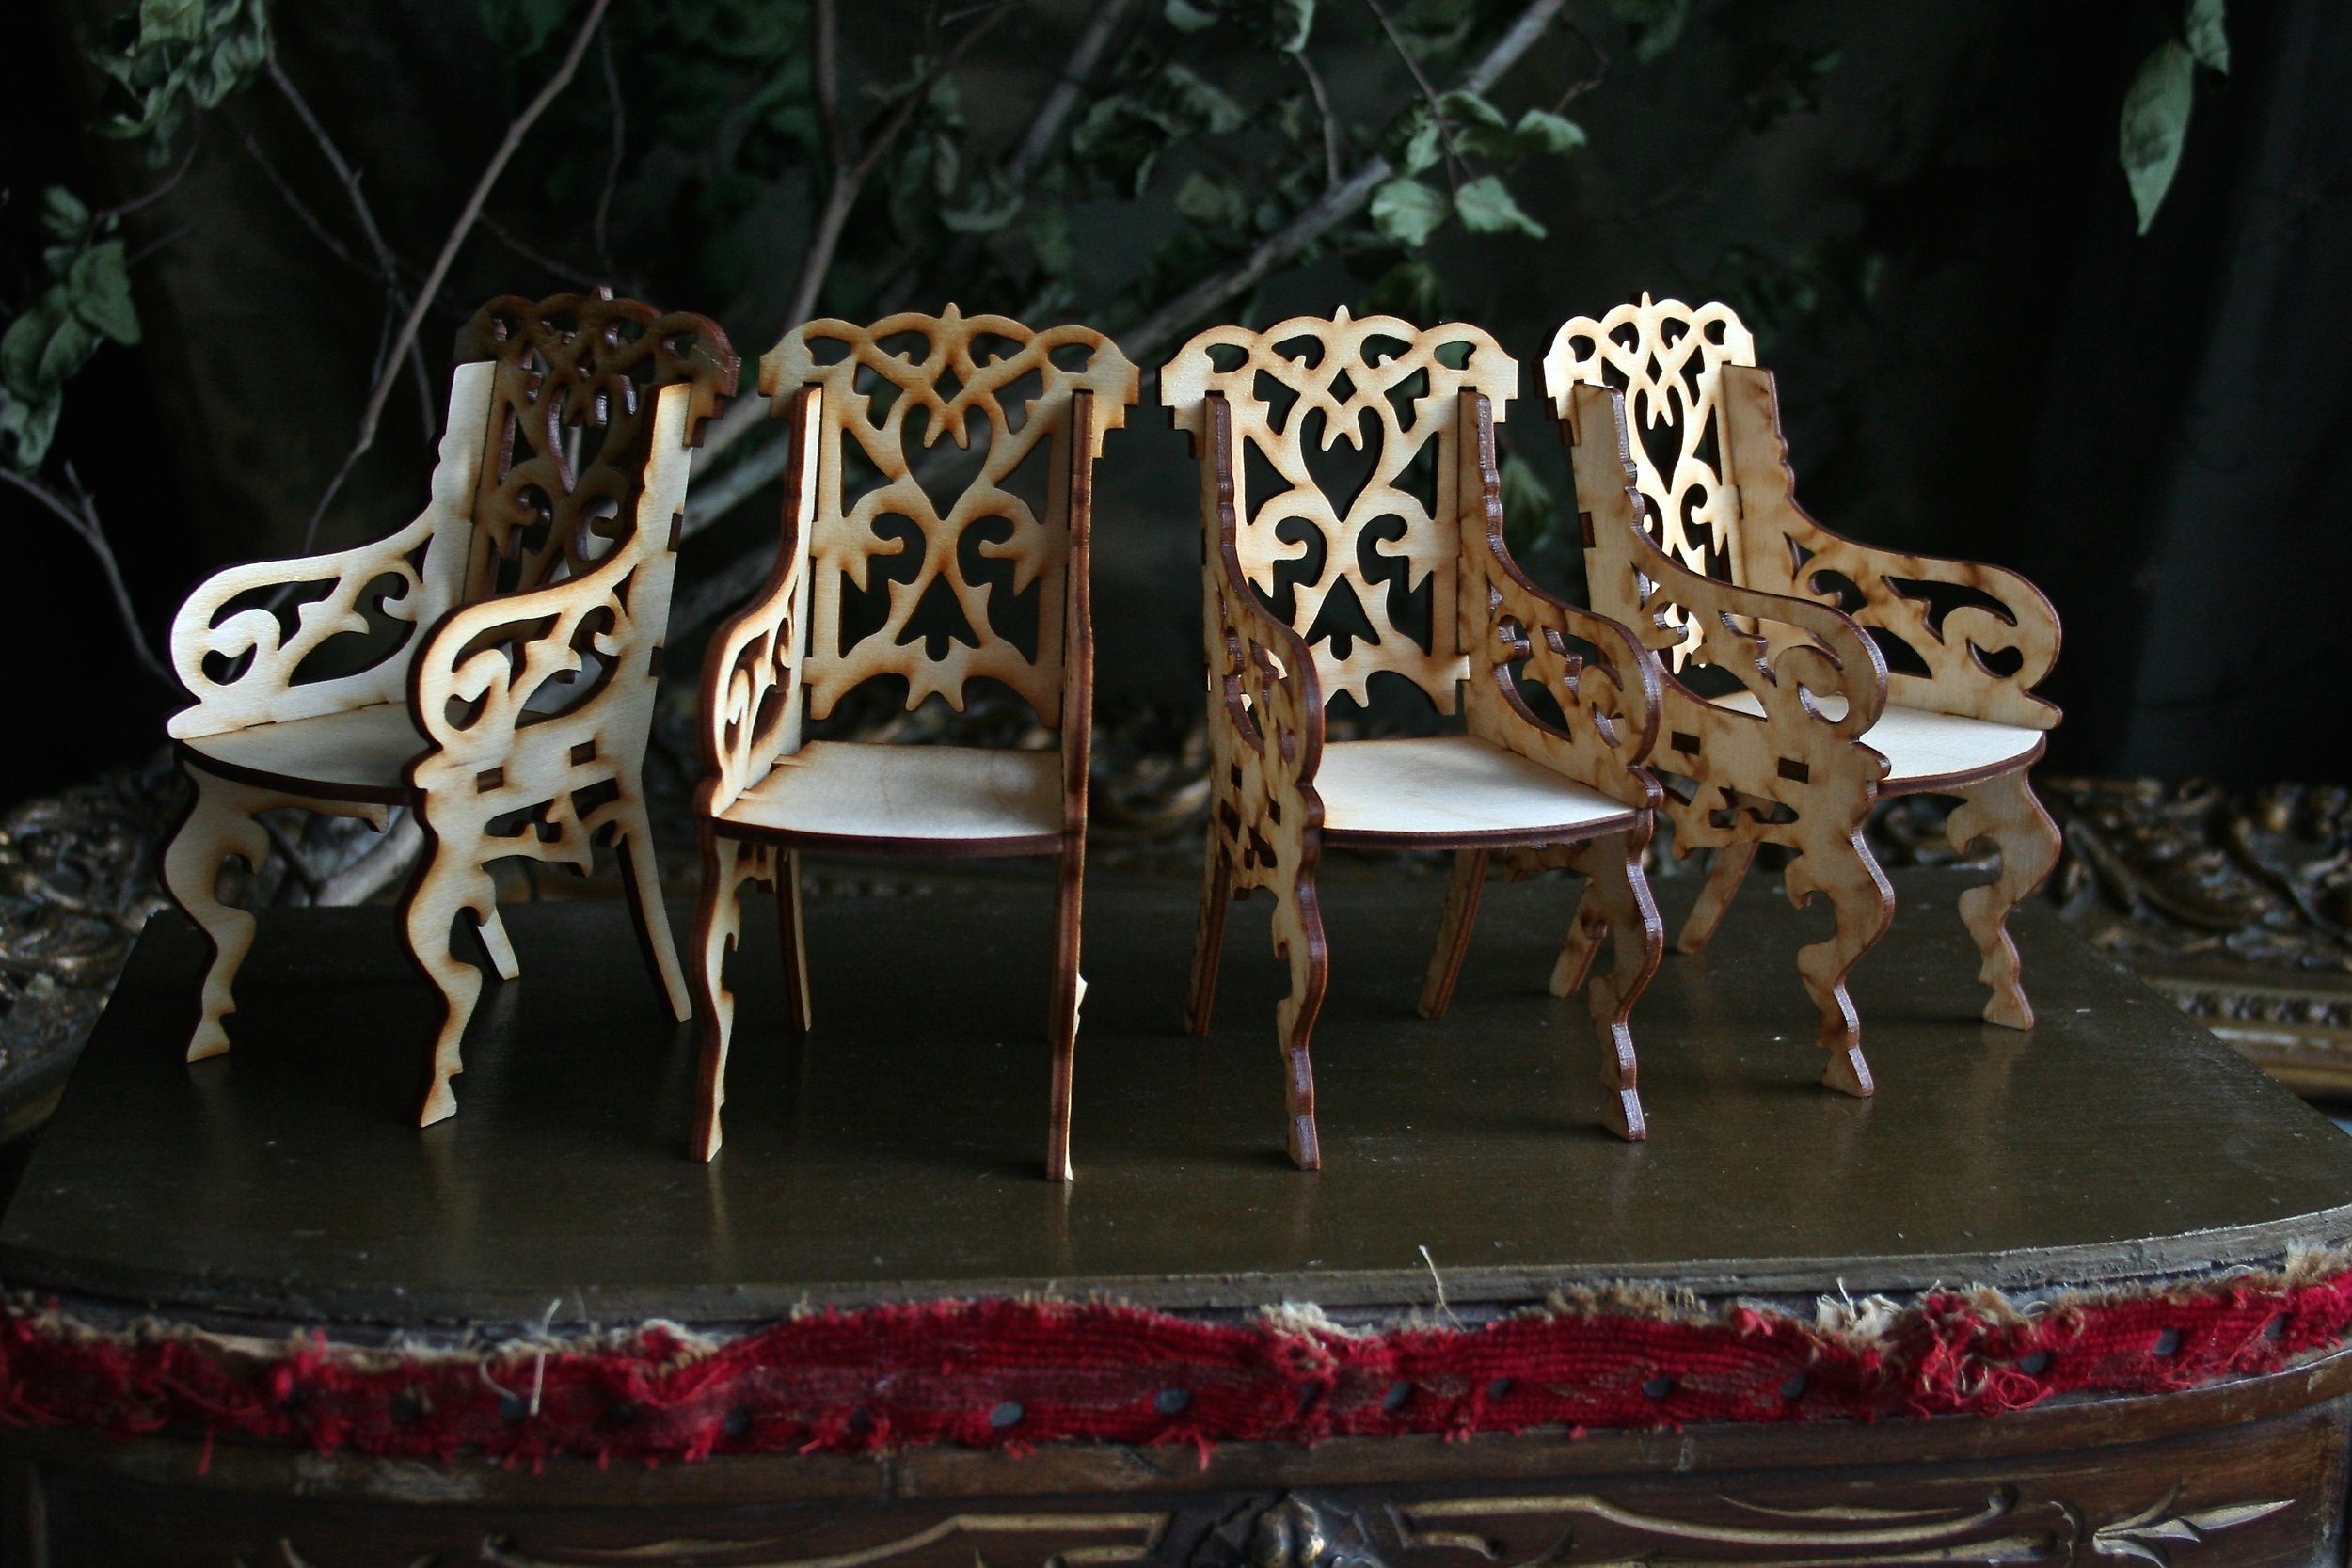
Ok, So I'm pretty excited about this... It's our very first RELICS & ARTIFACTS® Private Label Stock. Cassiopeia is queen of the celestial royal family and we thought her name was perfectly suited for our new mini throne wood craft blank!
Read moreRuby Red Bird Pendant

For me life wouldn't be worth living without this little bit of magic.
Read more